Console Table Routing Project
A neat and stylish console table made with wood rescued from a pile of old garden furniture!
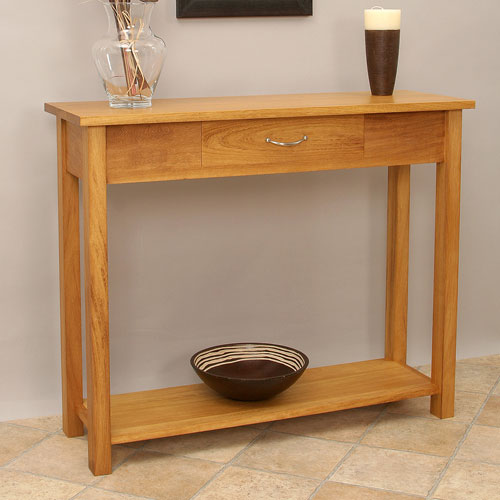

Good quality hardwood is becoming such an expensive and precious resource these days that it should always be used sparingly. It is therefore even better if you can recycle old timber that would otherwise be consigned to the bonfire.
There is something immensely satisfying about rescuing cracked and dirty pieces of wood and giving them a new lease of life by turning them into a really nice piece of furniture that will be around for many years to come.
Step 1 - Selecting and Preparing the Timber
I have had a little console table project in mind for sometime, just waiting for the right material to come along, so when I recently spotted a pile of old garden furniture piled up just waiting for a match, it seemed too good an opportunity to miss.
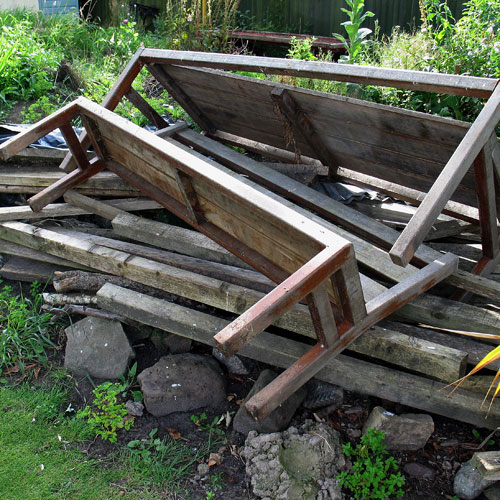

After a polite request the wood was mine for taking away, the excitement being that you are never quite sure what you have got until you get it home.
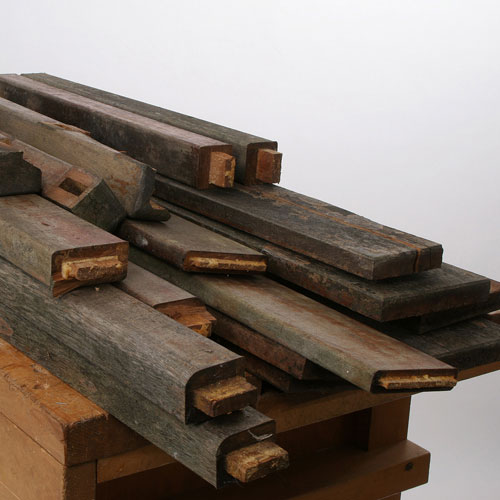

Once in the workshop a few minutes with a big hammer and I had the makings of some very usable timber which I suspected to be Iroko.
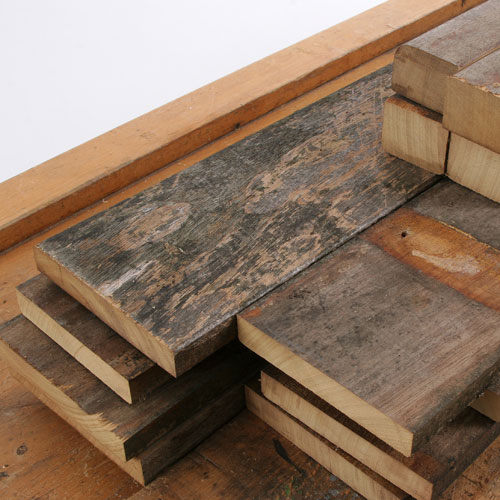

Although the outside was dirty and checked, the underlying timber appeared to be perfectly sound and I soon cut out enough usable pieces for my table project.
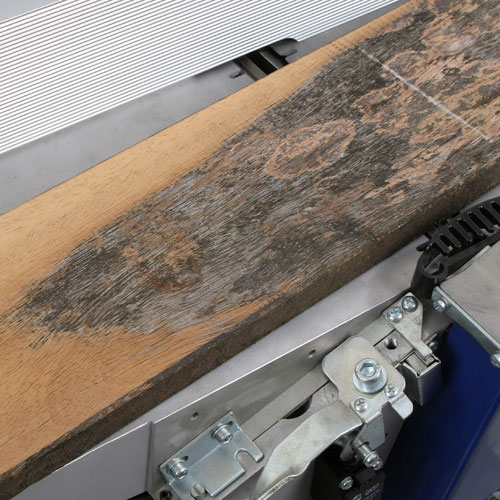

The only downside with secondhand timber, particularly that which has been used outside is that it is often impregnated with grit, so give it all a good brush before you start. A quick pass over the planer reveals some wonderful grain beneath and fortunately much of the surface cracking is only very shallow.
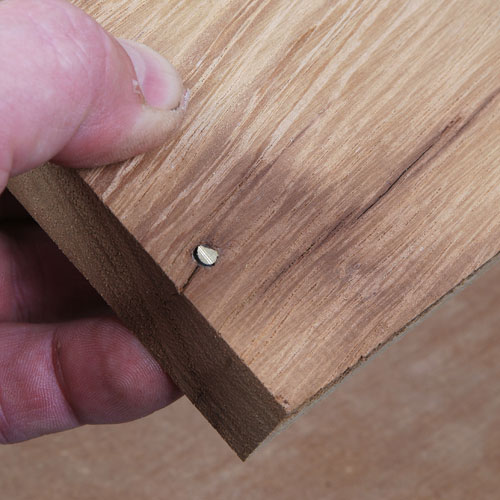

There may also be foreign bodies embedded within the timber in the form of screws and nails and these must be removed before you start. You only have to catch one nail on the saw or planer and what was initially very cheap timber soon becomes quite expensive by the time you have had the blades reground. I am well aware of this potential problem and checked the timber over thoroughly, but even so managed to miss a broken off screw.
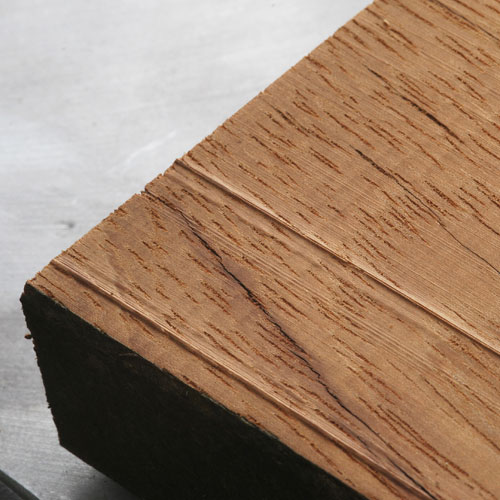

This did some quite severe damage to the knives leaving a characteristic ridge down the planed surface, fortunately this was at one end of the cutterblock rather than the middle for once, so I was able to work around it on subsequent cuts.
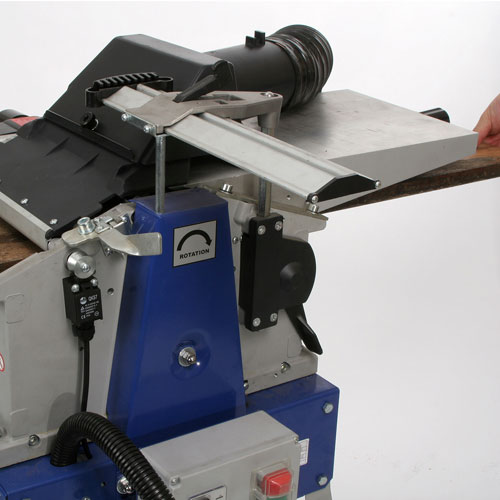

With one side planed perfectly flat and clean, pass the material through the thicknesser to clean up the other face, taking a very light final cut to leave the best possible surface finish.
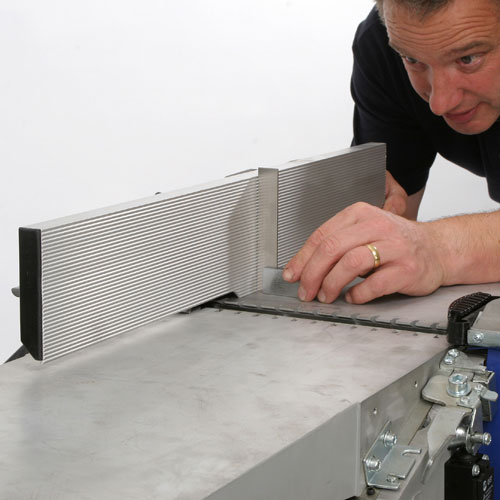

As this project requires the top and shelves to be made up from several narrow pieces it is vital that the edges are planed perfectly square to the face, so take some time to set the fence properly.


Plane one edge, taking care to orientate the grain correctly to minimize any tearing and keep firm downward pressure on the outfeed table to ensure the edge is planed true.
Step 2 - Spindle Moulding and Biscuit Jointing
The wood now needs marked and prepared in order to join the materials.
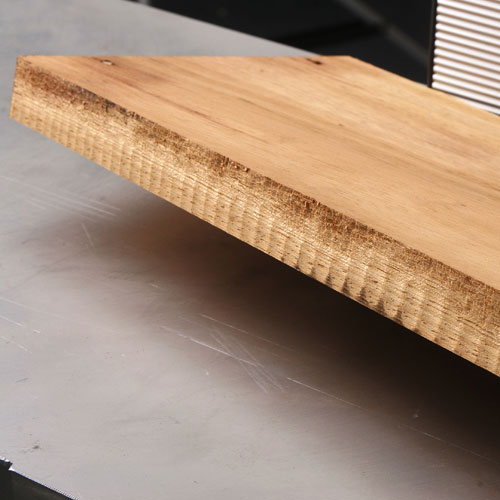

Beware of feeding too quickly over the cutterblock, or the edge will end up as a series of tears and ripples that will prevent the joints from fitting together closely.
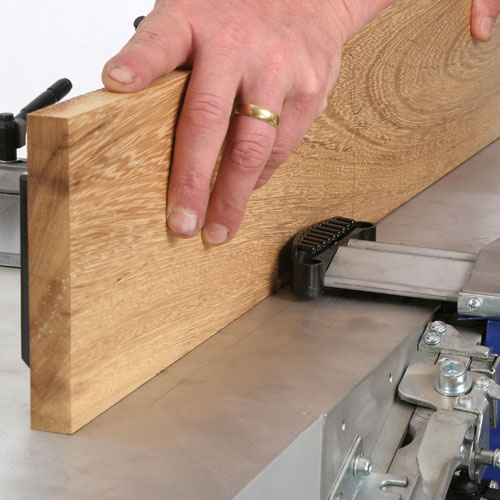

The purist woodworkers insist on shooting edge joints by hand, alleging that you cannot get a good enough finish off a machine planer. I would disagree and nearly always work off a planed finish, but having straightened all the edges, I then move the fence across the cutterblock to a less well-used and therefore sharper portion and take a final light and slow cut.
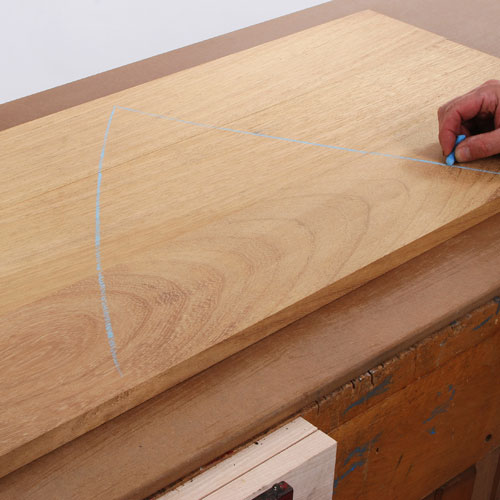

Start by planing the material for the top and shelves and then play about with the orientation of the boards until you get the best possible match. When you are happy, mark them with a Vee using chalk to make sure they can easily be put back in the correct sequence.
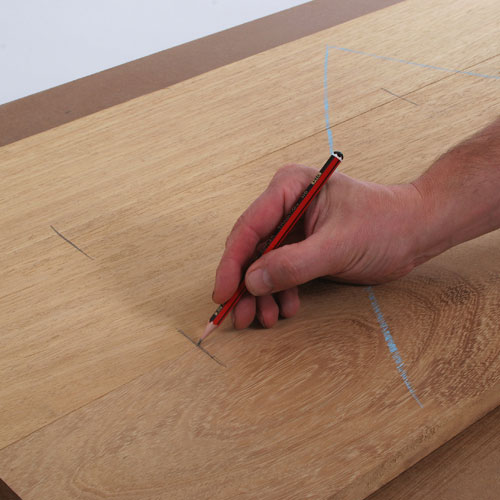

Biscuits are the ideal jointing method for tops like this, so mark out for the position of each biscuit, three per joint should be plenty on a top of this size.
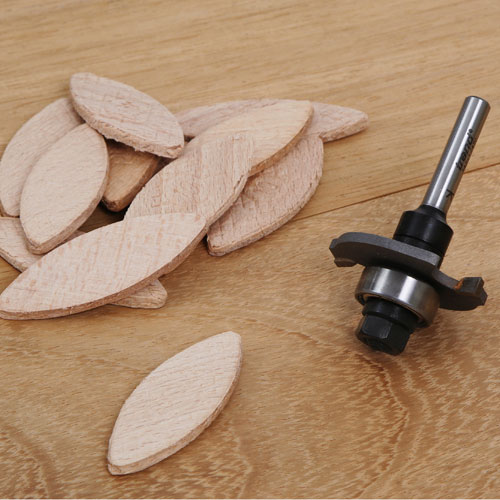

You can buy dedicated biscuit jointing machines, but if you have a router you can cut the joint very much more economically using a biscuit jointing cutter, just changing the bearing diameter to suit the size of biscuit.
Step 3 - Routing Application, Clamping and Glueing
You will now have to use your router cut the slots you have marked, and then clamp and glue the materials together.
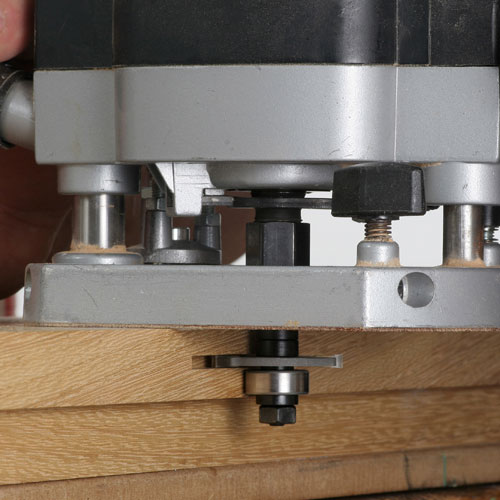

Adjust the cutter position to be roughly central on the board edge and cut a short slot at each of the marked pencil lines. Provided you work from the face side on each board the biscuit slot doesn´t have to be perfectly centralized.
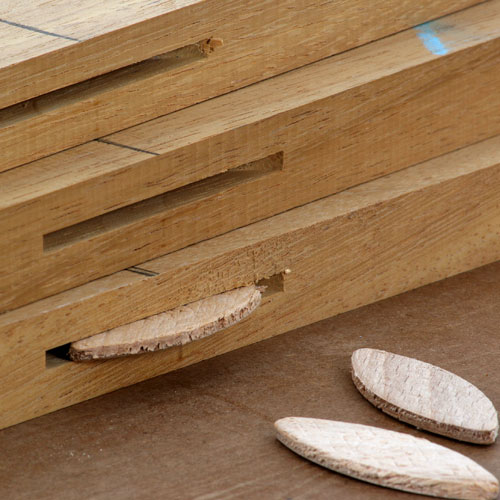

Cut the slots slightly over length to give you some adjustment leeway later on and make sure any ragging around the ends of the slot is cleaned up.
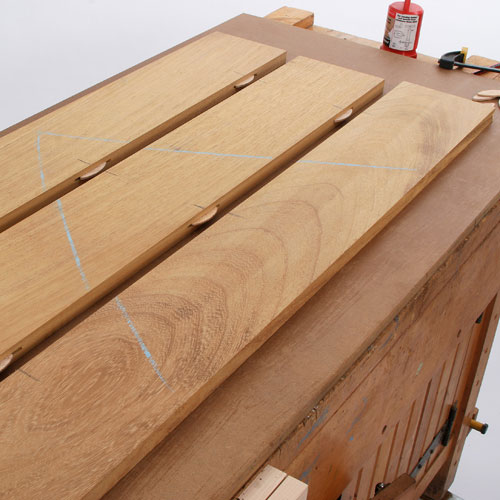

Lay the boards out again on the bench in the correct orientation and check that the biscuits fit properly and everything lines up correctly before you start gluing up.
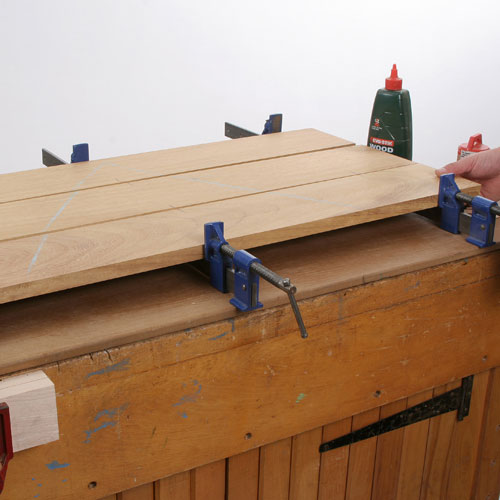

The easiest way to cramp up the boards is to lay them out across the cramps with the timber resting on the bar of the cramp, I must confess this was always the method I used to use.
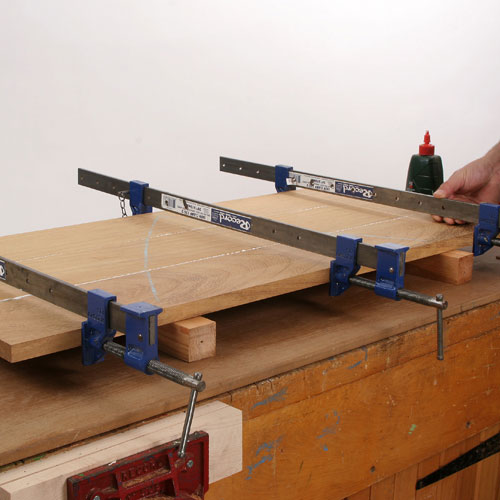

The only snag with this is that if you´re using water based glues, the cramp tends to leave a rusty mark on the timber surface where it contacts the glue and this mark is difficult to remove later. So instead, lay the boards across some timber battens and apply the cramps from the top keeping the bars well clear of the squeezed out glue.
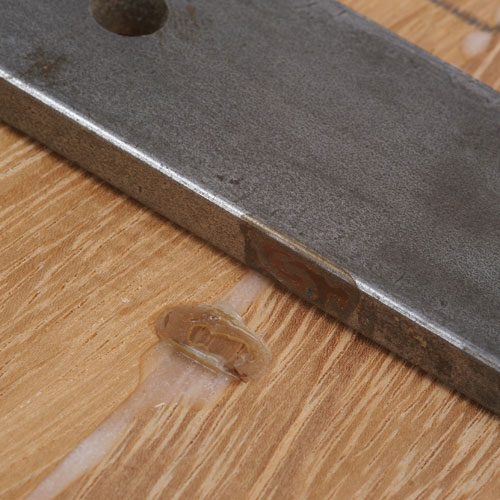

As I expected, after several hours the glue caused localized rusting of the cramp bar which subsequently stained the timber surface and required some serious work with the sander to remove, so that was a good lesson learned!
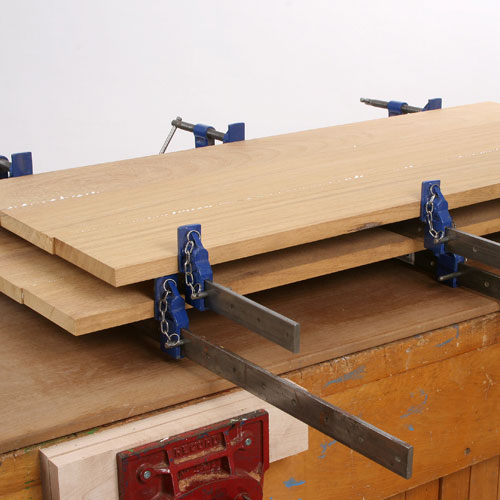

There is inevitably some squeeze out of the glue and there are various schools of thought as to how to deal with it. Some advocate wiping it off with a wet cloth, but I have always found that this affects the absorbency of the surface for any subsequent staining operations and you then end up with a very patchy appearance. My preference is to leave the glued boards horizontal, so that the glue doesn´t run anywhere and just wait for it to dry.
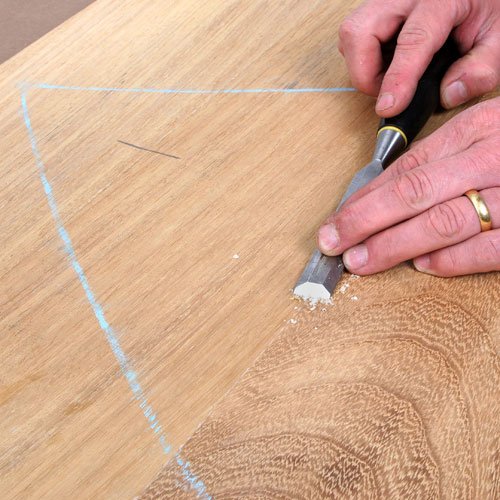

Once dry you can then use a sharp chisel to cut it away cleanly and the surrounding surface is not compromised in any way.
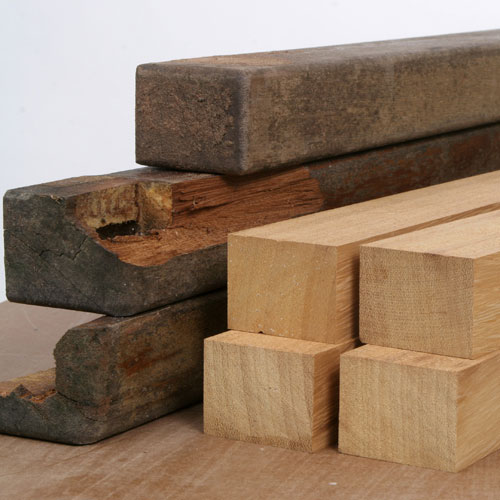

Whilst the glue is setting, machine up the material for legs. In this case the final dimensions were dictated by the available material as I wanted to remove the radiused edges and end up with perfectly square corners.
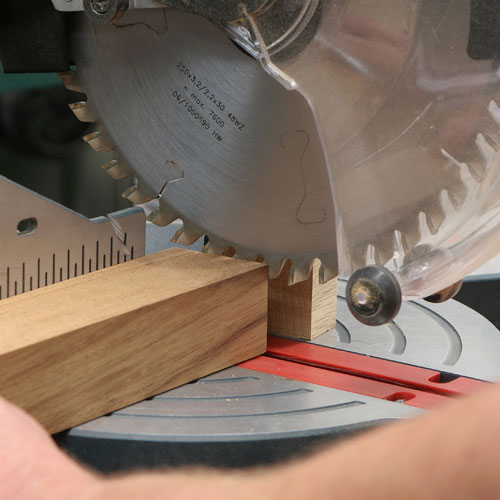

It is essential that all the legs are exactly the same length on a project like this and a chop saw is the ideal tool for getting them cut perfectly true and square, but measure carefully to get the length spot on.
Step 4 - Table Side and Leg Assembly
The next stage involves constructing the table legs you produced earlier.
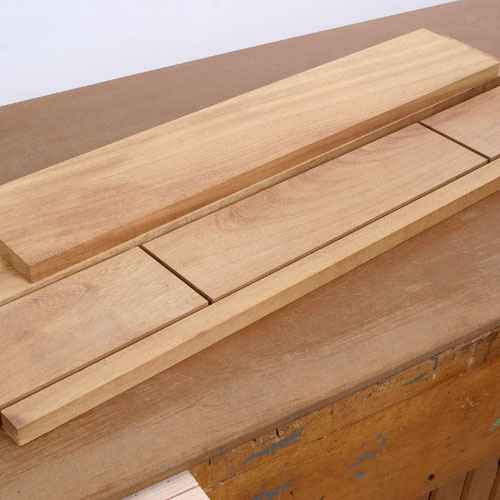

Machine up some of the other material to form the sides, I split the front board into four components to allow me to separate out the drawer front and at the same time maintain the grain continuity.
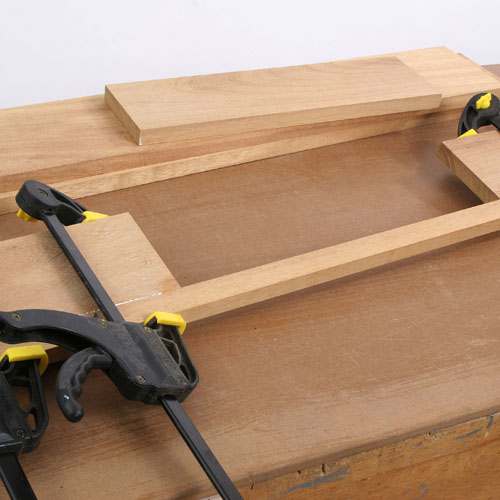

Three of these components are then biscuit jointed and glued back together to form the drawer opening.
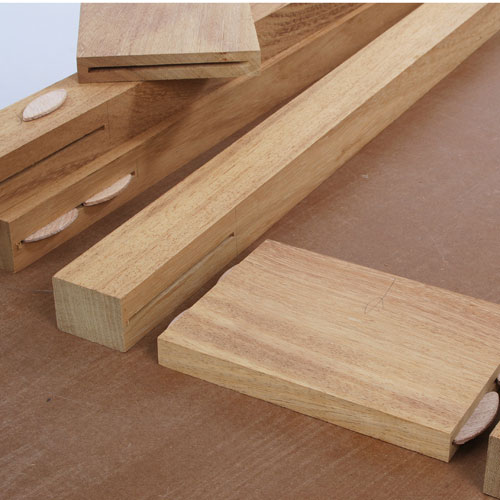

Biscuits are also used to join the sides to the legs which is a much easier option than trying to cut tenons.
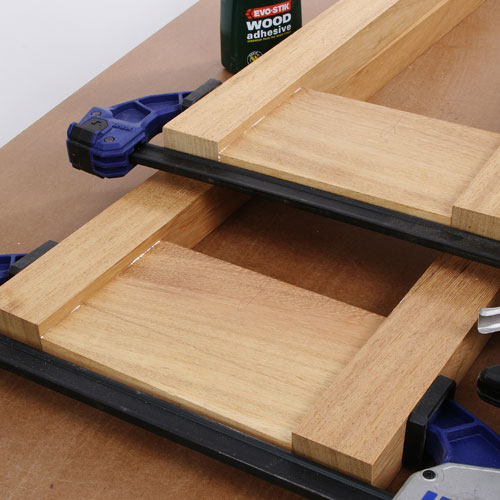

Glue and clamp each end, adjusting the joint carefully so that the top of the side lines up perfectly with the top of the legs, you don´t want to be trimming anything later.
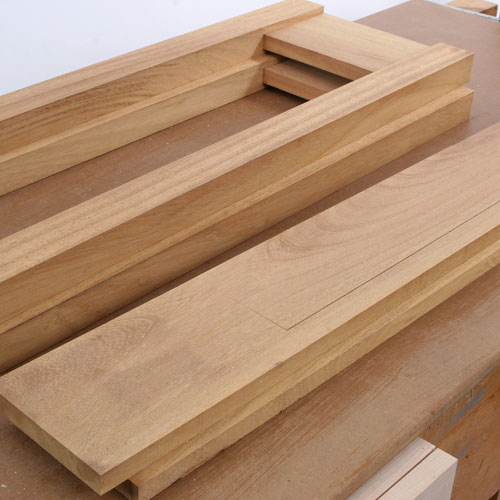

Once the front rail is set, the joint can be cleaned up and hopefully will be virtually invisible with the grain following through perfectly.
Step 5 - Leg Frame and Box Assembly
The legs now have to be attached to the rest of the table, and the table box needs to be assembled.
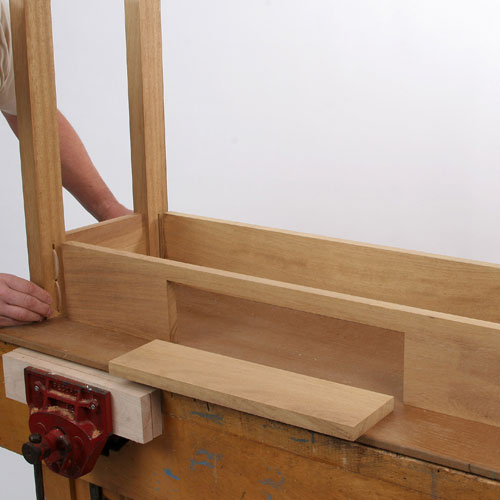

These long sides are then jointed to the legs in exactly the same way as the shorter ones, laying it all out on a perfectly flat board on the bench top so that it all lines up properly.
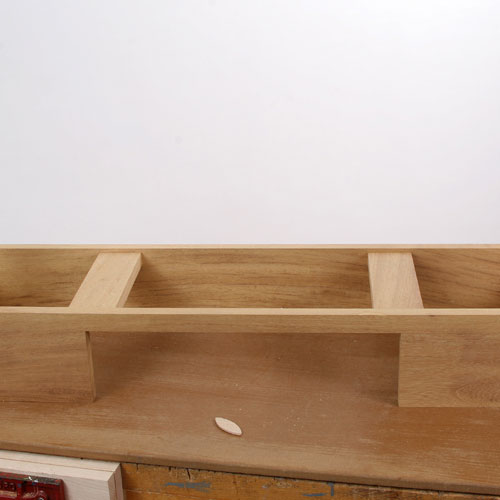

You also need to fit two crosspieces between a long rails to take the drawer guides and these are once again all fixed with a single biscuit joint.
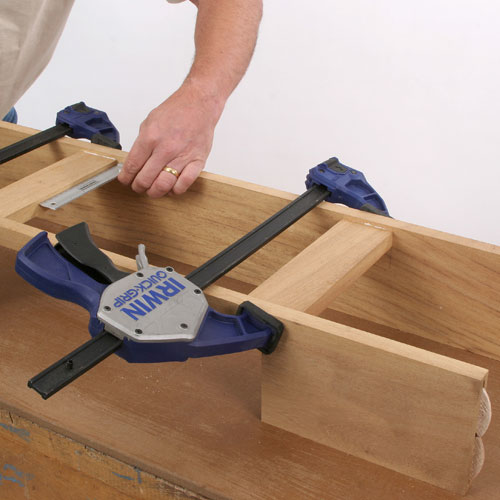

Don´t forget that the gluing up operation has to start with these short crosspieces, their exact position is not critical, but do make sure they are square.
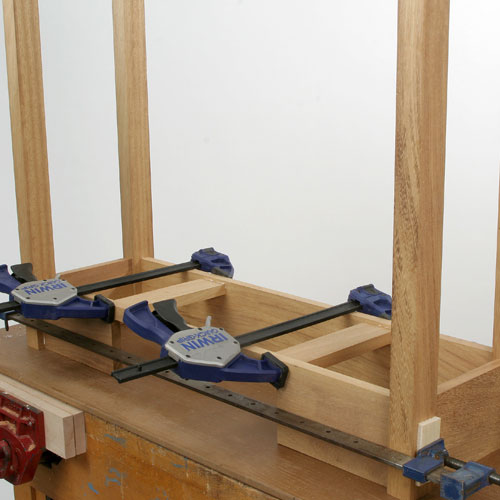

Then you can join the leg frames onto the long rails and clamp them in position using some plywood pads to prevent the clamps marking the timber surface.
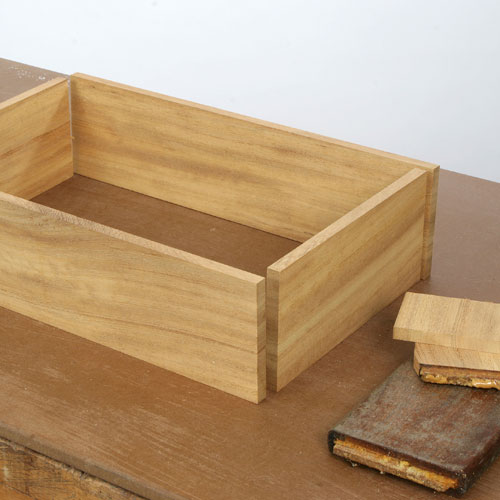

The drawer box is made up using some of the more badly surface-checked material as it has to be planed down a lot thinner. Cut it just slightly smaller than the drawer opening in all directions, so that the finished drawer slides easily.
Step 6 - Glueing of Drawer Box
Additional joints need to be formed and secured.
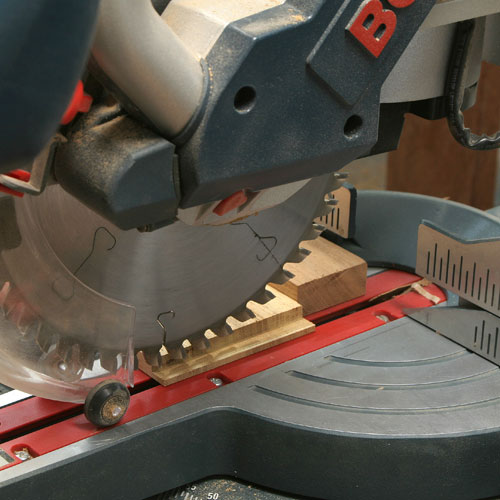

The drawer box is jointed with simple corner rebate joint, the easiest way to cut this is by using the trenching facility on the sliding head mitre saw.
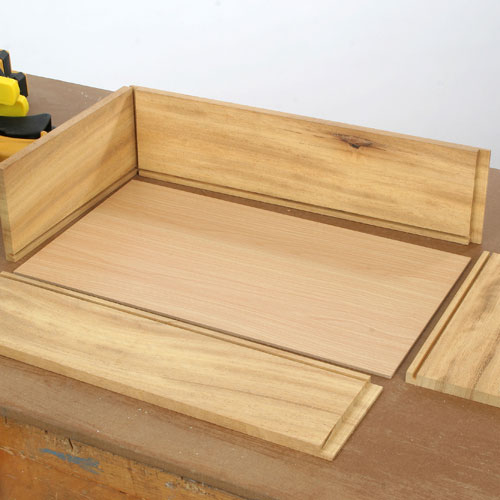

The drawer bottom is a piece of veneered hardboard salvaged from some old kitchen units, fitting it into a slot cut in the drawer sides using the router and a 4mm cutter.
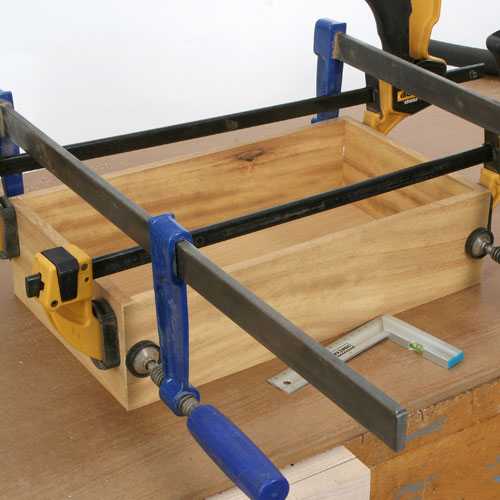

The whole assembly just glues together, but once again make sure it stays square as you apply the clamps.
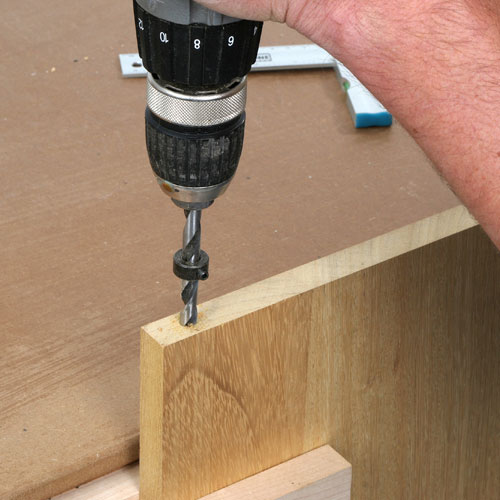

When the glue has cured the bottom shelf can be cleaned up and cut to size to be a tight fit between the legs. It is held in place with dowels, one in each corner. As there are only four holes to be drilled, I relied on some careful marking to get the hole position rather than making a jig, but use a depth stop to get the holes consistently deep.
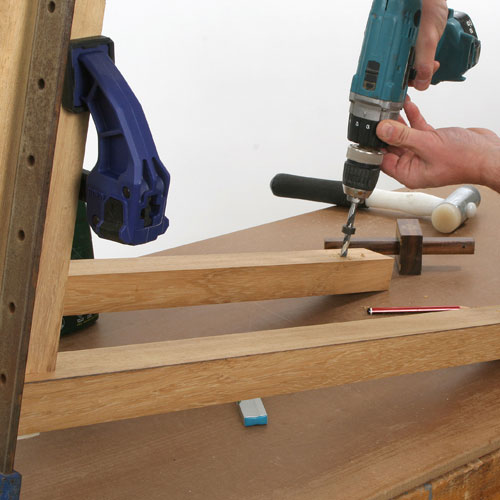

The matching holes in the legs are drilled in the same way; just take your time to get them positioned correctly.
Step 7 - Final Glueing and Top Construction
The table top now needs to be glued and sanded.
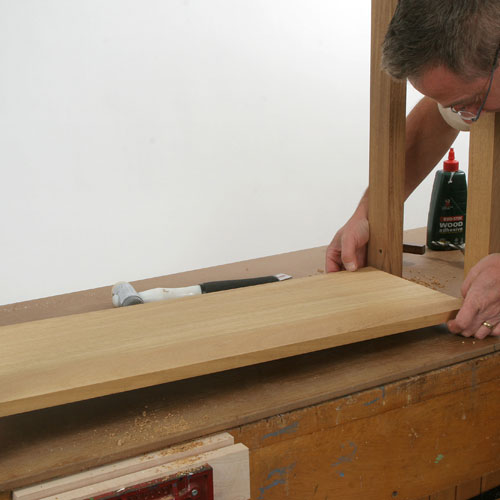

It would perhaps have been better to fit this shelf in place before assembling the legs and long rails together, but I figured that there should be enough 'spring' in the legs to allow it to slot into place.
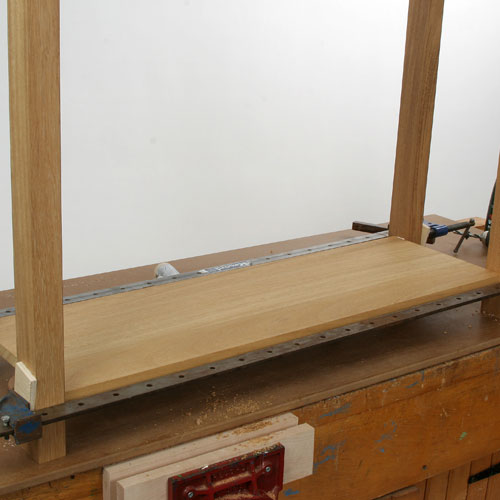

Glue and clamp it all together to make sure the joints pull up really tight.
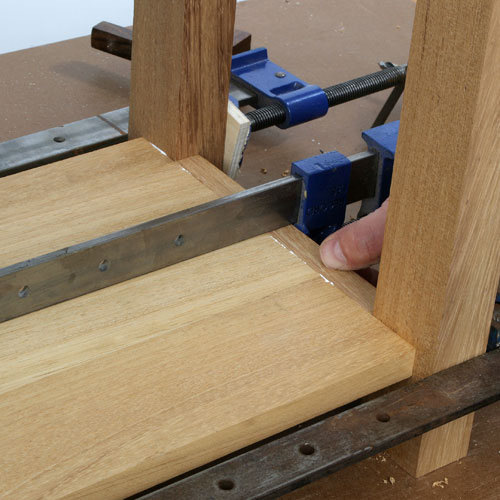

The breadboard style ends on this bottom shelf are just glued in place although you could strengthen it with a biscuit. I felt that the glue would be sufficient on its own.
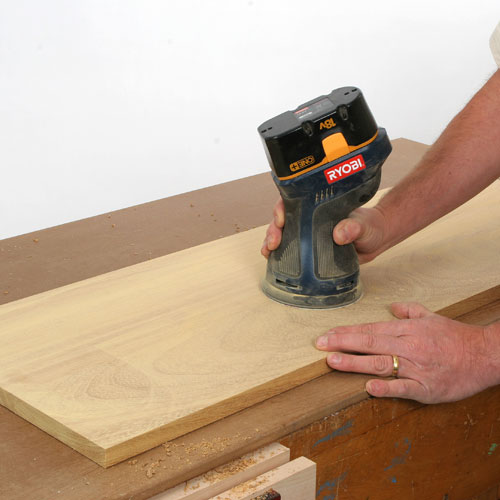

The top can now be cut to size and cleaned up. For big areas like this I find it hard to beat a random orbit sander, working progressively down the grades of abrasive to leave a super smooth finish without those annoying circular scratches that you get with a conventional orbital sander.
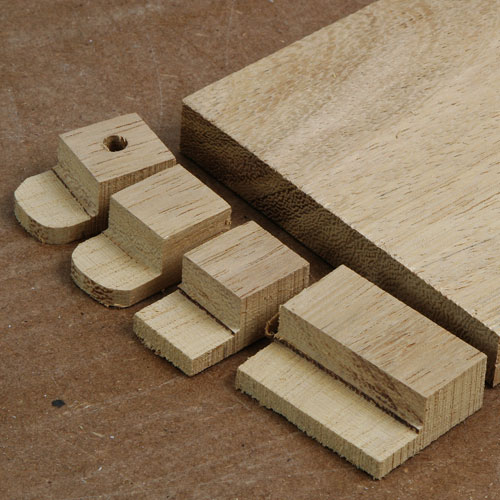

To allow for movement of the top, it is held in place to the frame using homemade buttons which are cut to size on the bandsaw and then further shaped on the disc sander.
To minimize weight, the drawer front was designed to be planted on after being significantly reduced in thickness, but at this stage disaster struck and the piece whose grain orientation I had taken so much care to maintain, broke up in the thicknesser as I was taking the final reducing cuts. It must have been weakened by some hidden splits that I had not noticed.
Step 8 - Finishing Touches and Presentation
The project is now nearly done, some finishing touches to the table must be done in order to deliver the desired result.
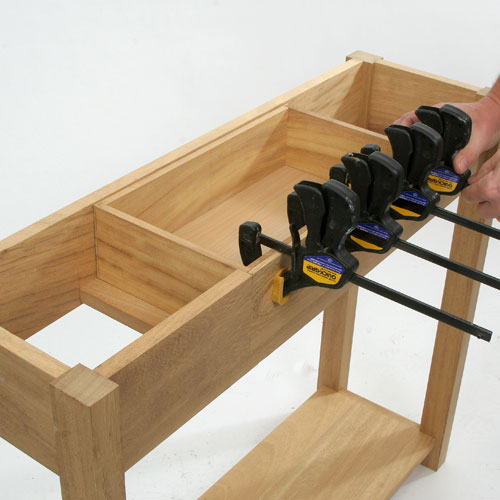

Hopefully the difference will not be so apparent when it all changes colour on exposure to light and air. Iroko always darkens to a rich brown colour after a few months. The successfully thicknessed piece is simply glued in place on the front of the drawer box.
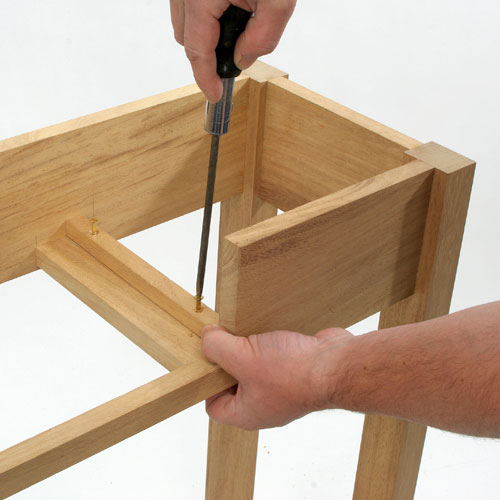

With the drawer in place you can mark the position of the guides and then screw them in place.
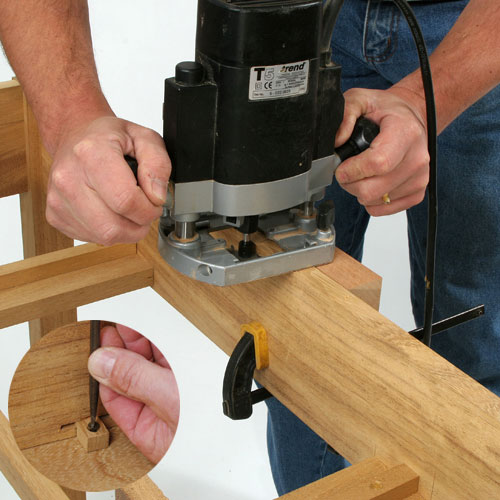

The slots for the holding buttons are cut with the biscuit jointing cutter, but temporarily clamp a block to the side where you are cutting to provide more support for the router base.
The buttons slip into the slots and are then screwed to the underside of the top to form a secure fixing that will still allow the top to move with any changes in humidity.
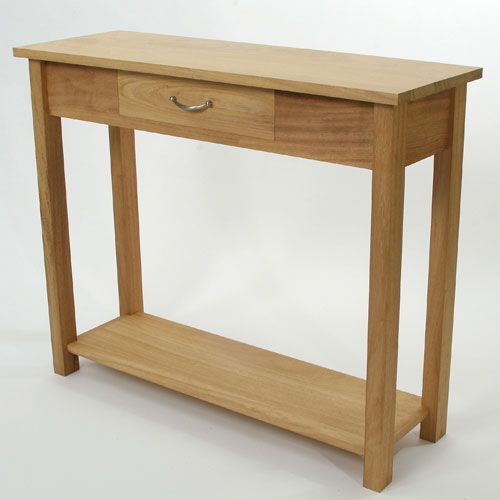

A thorough sanding and a nice handle on the drawer complete the job, I hope the drawer colour darkens down soon!
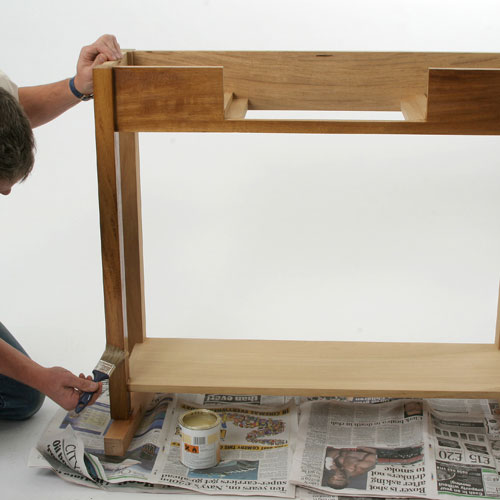

To finish the project I applied three coats of cellulose brushing lacquer, sanding thoroughly between each coat with 320 grit abrasive paper and then finished of with a coat of soft paste wax applied a pad of 0000 steel wool. Don't forget to apply a coat of the lacquer to the underside of the top and shelf as well to prevent them bowing.


This is the completed Console Table Routing Project.
