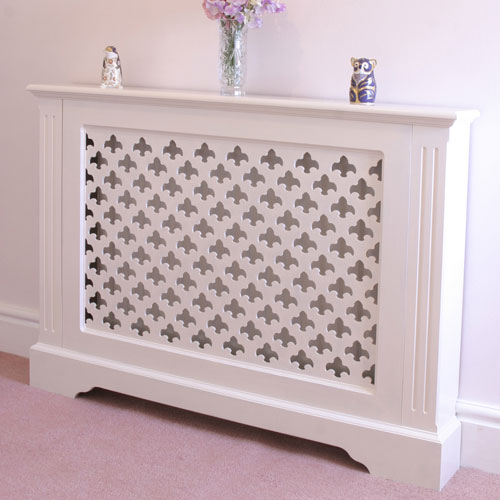
Radiator Cover Routing Project
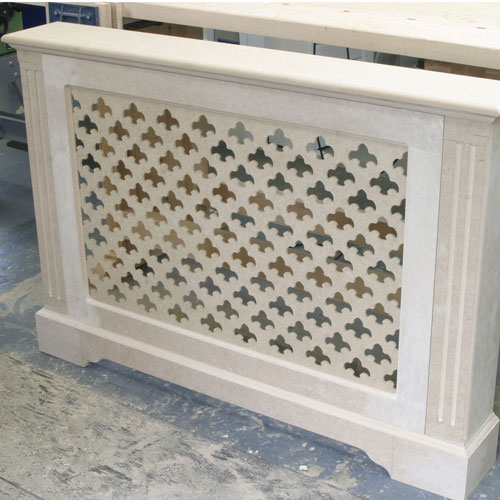
This radiator cover is elegant in design and simple. It has a sturdy frame compared to flimsy ones you can buy.
Technology still seems to have long way to go with regard to the design of central heating radiators. Even relatively modern versions are rarely elegant and their associated pipe work does little to enhance the overall appearance.
The answer of course is too hide the offending radiator, but suitable ready-made covers seem to be both very expensive and rather flimsy even if you can find one that is the right size.
I was recently approached to make a custom-built cover for a spare bedroom radiator to match the existing painted decor, and having made several in the past I know that it is a relatively simple construction job. For anything painted like this, MDF is the ideal material despite the dust drawbacks and the problems with finishing.
Step 1 - Preparing the Timber
The biggest advantage of MDF is that it is available in big sheets that are evenly thicknessed, perfectly flat and totally stable. Buy it in full sheets from a builders merchant, but be aware that such an 8" X 4" sheet is heavy and difficult to handle on your own, so start by laying it down on some bearers on the floor and then cut out all the pieces to approximate size using a power saw.
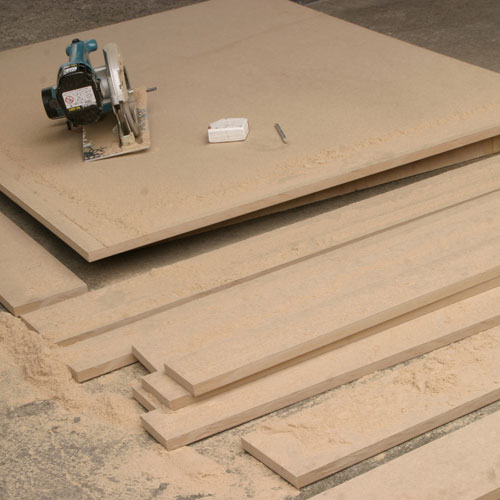
Obviously always try to cut the sheet in such a way that waste is minimized, a little thought and planning before you make the first cut is often well rewarded.
Remember that cutting strips off the end of the sheet may seem the most economical route, but do make sure that you can still get out any necessary long lengths, ripping these off the side before the sheet becomes too short.
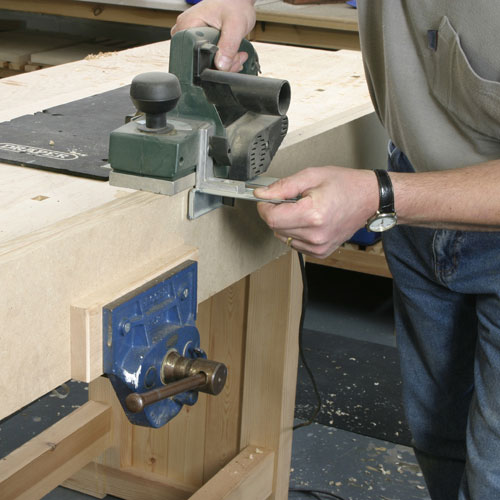
It is essential that all matching pieces are now reduced to exact size, so plane them up using a portable power plane with TCT knives, clamping them together first, both for consistency of size and also to provide a wider planing surface that will assist you in getting the edges square.
I use the side fence to help with this operation, but remember to keep your fingers clear of the underside of the planer.
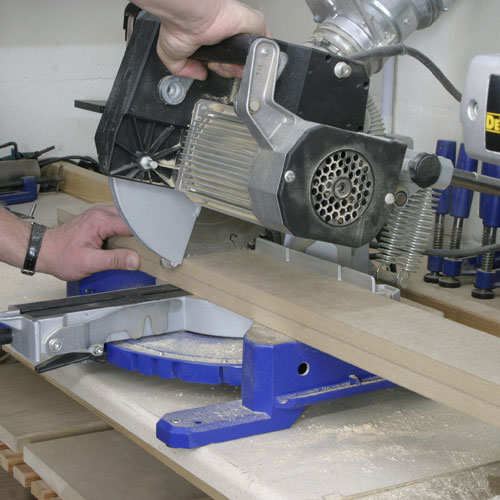
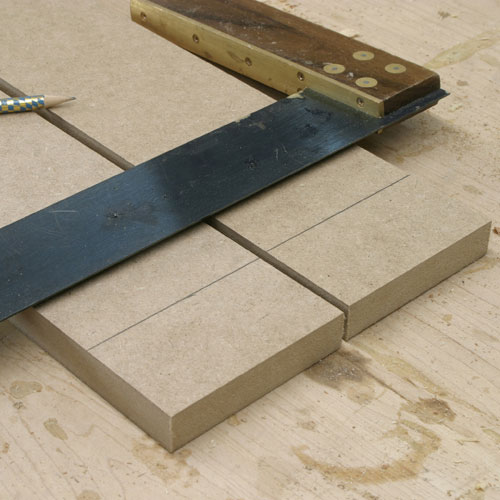
A mitre saw makes short work of cutting the pieces to length, again clamp matching pieces together to get them identical in size.
Although these saws will produce perfect cuts, they will only do so if they are set up correctly in the first place, so it is worth spending a little time occasionally just checking that everything is square in both planes when it to set to zero degrees.
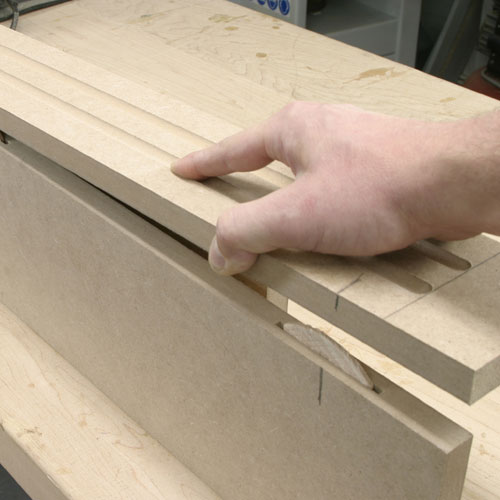
Step 2 - Fluting the Front Faces
The two front faces of the cover are fluted for decoration and it is a lot simpler to put these in at this stage, while they are still flat pieces.
Mark off the limits of the fluting, squaring across both pieces at once. To position the actual flutes themselves, hold a steel rule diagonally across the width of each piece with the corner of the rule dead on the edge.
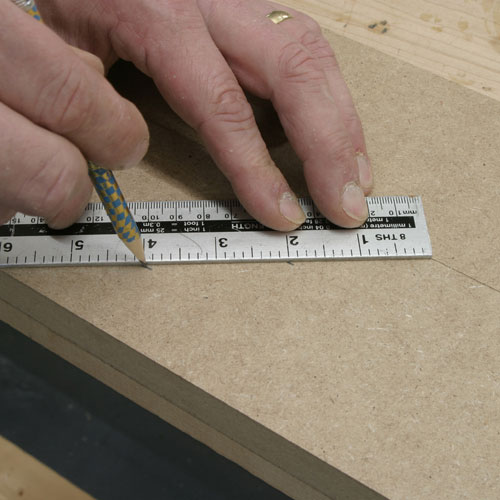
Then angle the rule until a graduation that will divide evenly by the number of flutes you require is aligned with the other edge. Now you can just mark of the centre line of each flute without having to do any complicated measuring or working out.
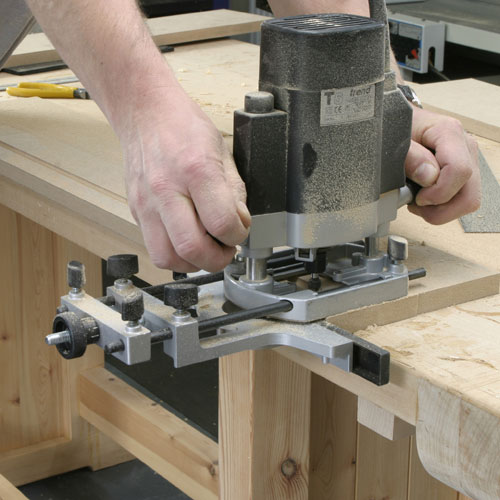
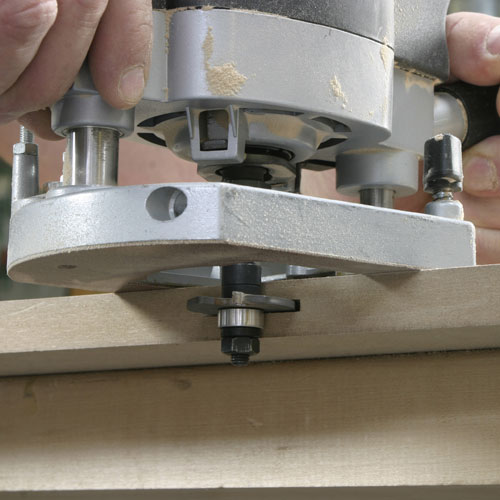
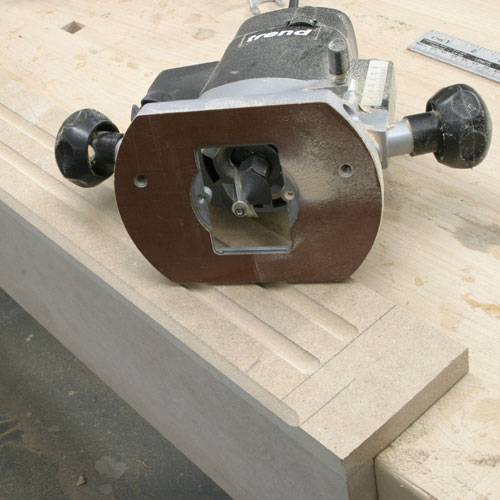
The flutes are formed using a core box cutter in the router setting the fence with a micro adjuster to get it perfectly positioned on one of the centre lines.
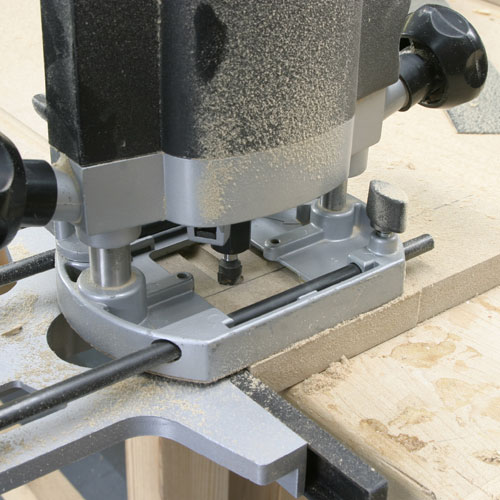
Work carefully and stop the router dead on the limit line at either end of the flute. You can work quite slowly here because unlike timber, the cutter is less likely to burn in MDF even if you stop moving it along the cut.

Anyway, any slight degree of burning will be covered by the painted finish. To get the flutes evenly spaced leave the fence setting exactly as it is and cut the second one from the other side of the workpiece. This ensures they are both exactly the same distance from each edge.
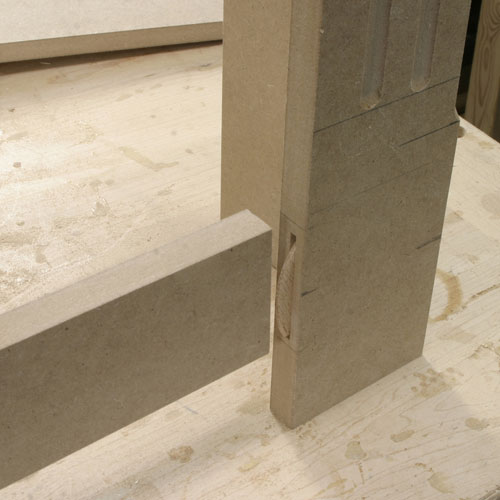
Step 3 - Assembling the Front Corner Supports
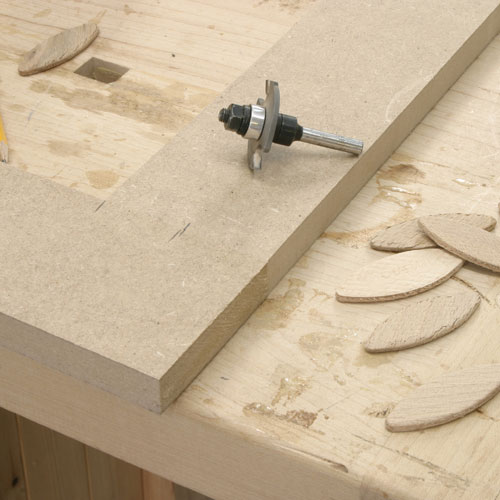
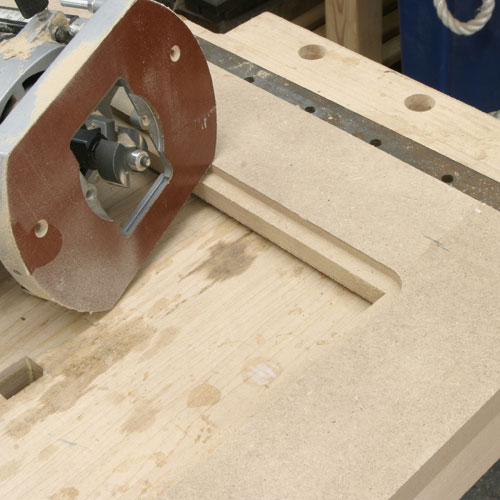
The next stage involves forming biscuit joints and assembling the front corner supports.
This is relatively straightforward when your working from the face of the work as there is plenty of support for the router base.
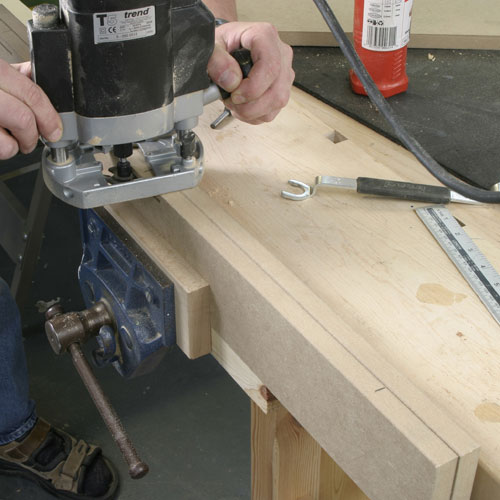
When you have to work from the edge for the opposite cut, clamp several pieces together to give the necessary support.
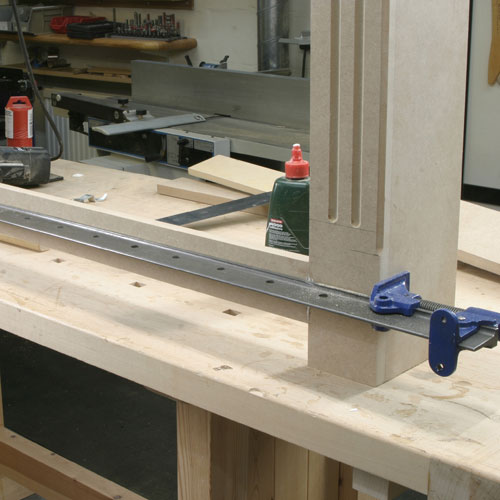
Three biscuits should be enough to hold the two pieces properly in line during gluing up. Remember that when you do assemble these two components that they are now 'handed' as the flutes are different lengths top and bottom.
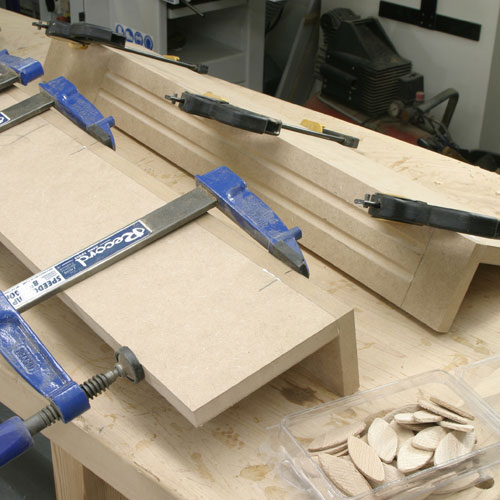
I use PVA glue and plenty of clamps to hold it all together whilst the glue cures, but beware of marking the soft MDF by over tightening the clamps.
Once assembled the corners of each front support are decorated with a stopped chamfer put in with a bearing guided 45 degree cutter. Again careful marking out will ensure that the chamfers match at either side.
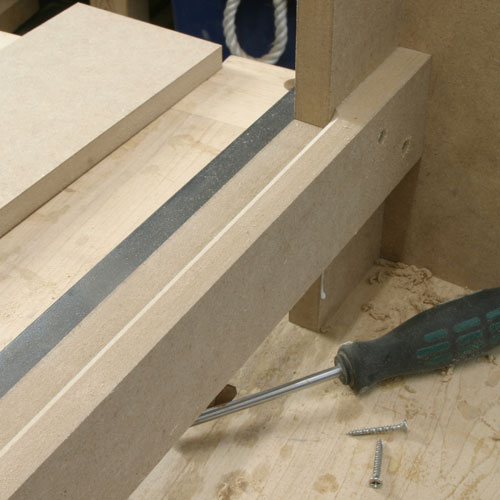
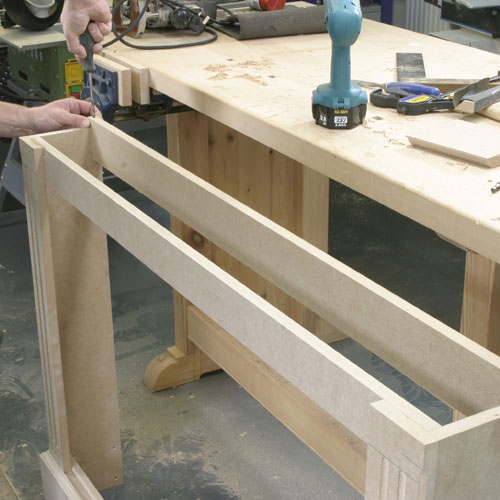
Step 4 - Constructing the Cross Rails
The front cross rail is biscuited in place in a similar fashion, note that there is a large gap underneath it to allow air to be drawn in at the bottom of the radiator.
This rail is again clamped in place but take special care that it is perfectly square to both of the uprights or you will make the job of fitting the front grille much more difficult later on.
Long thin rails of MDF are relatively weak so beware of over tightening the sash cramps or you will bend the rail quite severely.
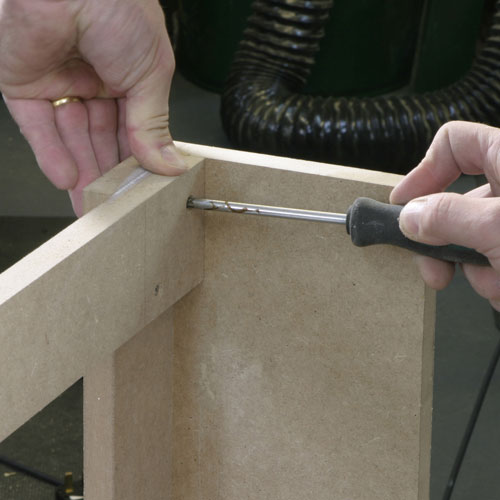
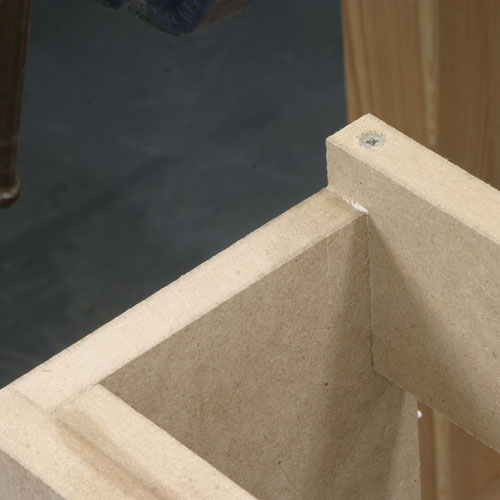
The top rail is screwed in place inside the uprights, cut this perfectly to length to maintain the squareness off the grille opening.
Another backing rail is screwed across the inside of the bottom front rail, but this is slightly wider, so that a small lip is formed to support the back edge of the grille when it is dropped in place.
The front plinth comes next and this has to have a large cut-out along the front to maintain the necessary airflow.
Step 5 - Curved Section and the Plinth Top
Additional cutting, sanding and sharpening now need to be done.
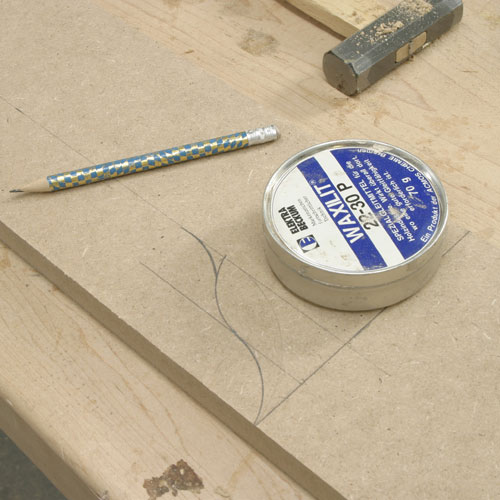
Use a variety of tins as templates to form the desired shape, but keep any curves as gentle as possible to make the subsequent cutting out and routing process easier.
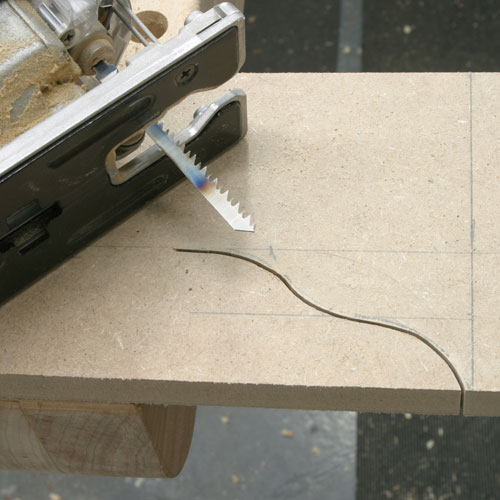
The curved sections can be cut with a jig saw using a suitable HSS blade, but even this will soon be dulled by the abrasive MDF.
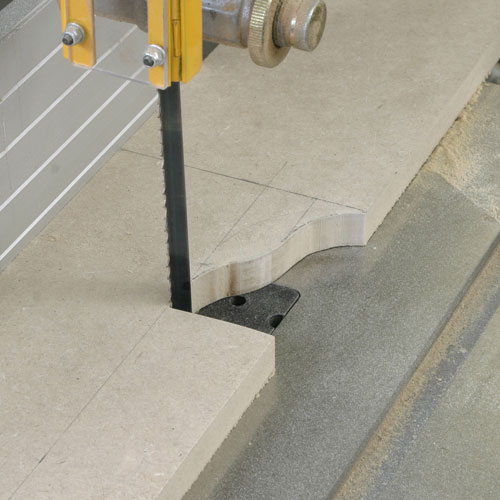
The straight section of the cut-out is better cut on the bandsaw if possible as this will produce a straighter line than the jig saw.
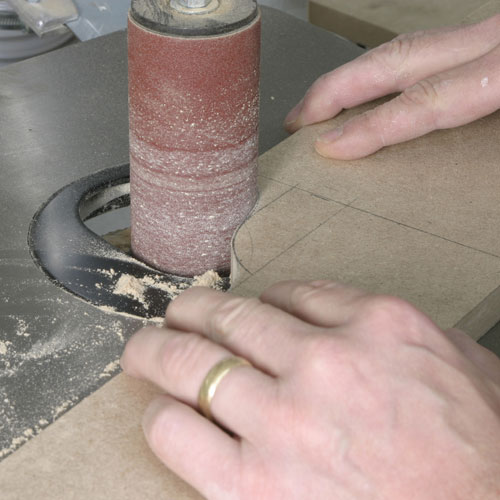
Use a bobbin sander to clean up the curves and hand sand the straight section using some fine abrasive paper wrapped around a sanding block.
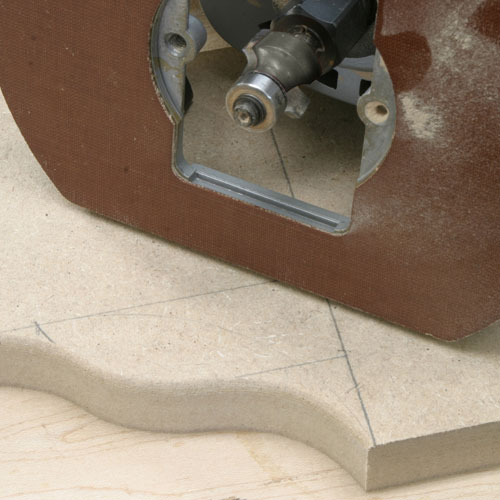
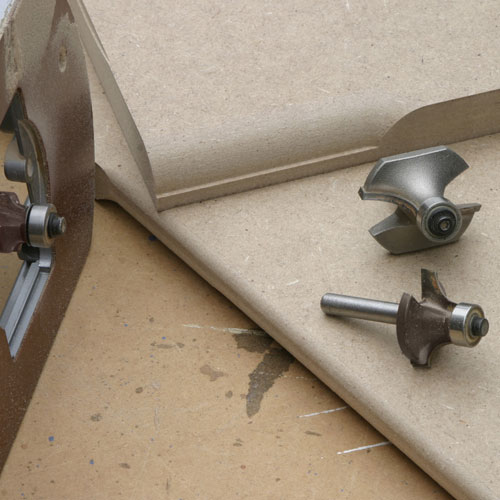
As a final touch use the router to put a tiny radius on the edge of the cut-out. Trend Ref. 46/11X1/4TC or C074X1/4TC.
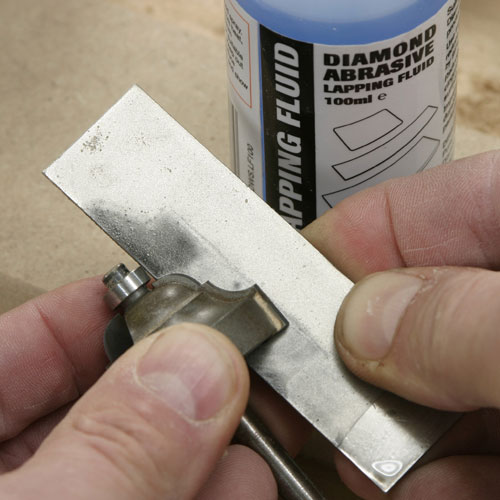
For any detailed work on MDF, always ensure that the cutters are really sharp before you start. A regular light honing on a diamond slipstone is all that is necessary to maintain a good edge, but don´t wait until it is too late as the honing only maintains an edge rather than restoring one.
Step 6 - Plinth Corners and Front Piece

Heavy cuts like this are best made in several passes, so make sure the depth stop is set accurately so that the profile come be reproduced accurately on all the pieces of the plinth.
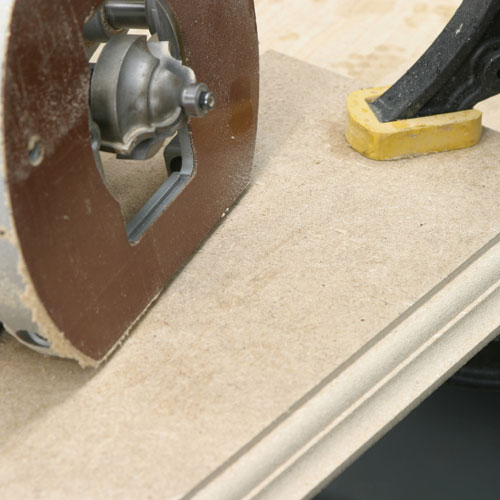
After the last pass with the cutter at final depth I always make another one at the same setting, this seems to just tidy up any small irregularities and results in a much smoother and cleaner profile.
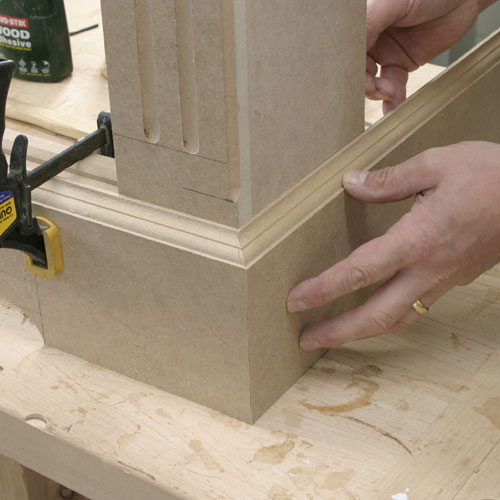
The corners of the plinth are mitred and the front piece fixed first. I then cut the mitre for the side on a longer than necessary piece and make any minor adjustments to get a perfect fit, before holding it firmly in place and marking the position of the final length cut.
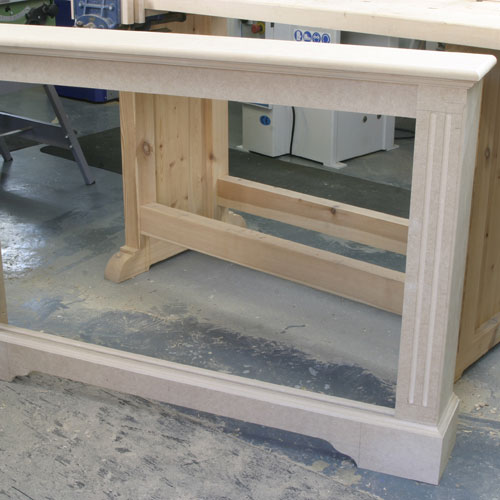
Step 7 - Frame Assembly
Now, all the indvidual parts of the frame have formed, its time assemble the radiator cover.
The top rear rail is screwed in place but is notched over the side supports.
It should stand proud of the uprights by exactly 18mm.
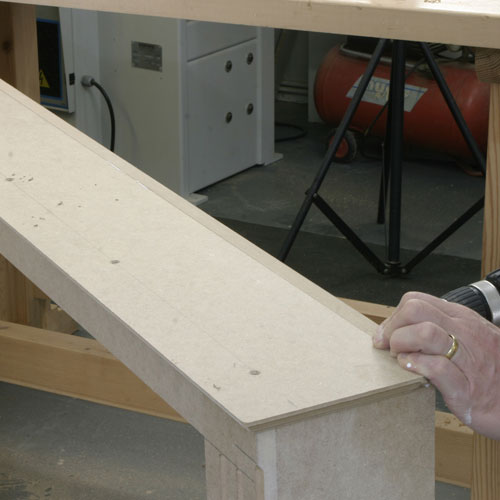
The top itself is made up of two layers of 18 mm material both of which are moulded on the edges to produce a decorative compound profile. The first piece is cut to size so that it sits flush with the back rail and projects and even amount around both sides and the front edge.
Experiment with a selection of different cutters on pieces of scrap to produce a pleasing profile when the two boards are fixed together. Don´t overdo the detail or you will be difficult to sand and finish, a simple collection of ovolos and radii always go well together.
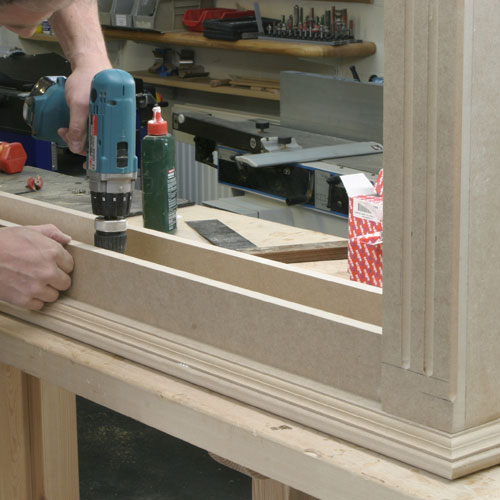
The first layer of the top can be screwed into the rails and uprights, but do drill properly sized pilot holes when you are screwing into the edge of MDF as it splits so easily. The second layer can then be glued and screwed to the top from the underside of the first laye
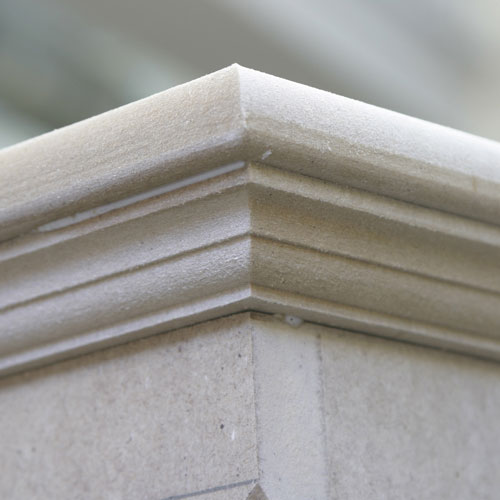
The result is a really nice decorative cornice effect that is so much more substantial than the kit form covers available in the DIY shops, the very simple construction producing a really strong framework.
With the frame finished, now onto the grill.
Step 8 - Creating the Front Grille
The front grille is equally simple to make, consisting of a simple framework that is joined together in the same way with biscuits.
The only critical part here is again to make sure all that it all stays perfectly square during the gluing up process.

Time and care spent squaring things up always plays off when it comes to finally putting it all together at the assembly stage.
The grille it self is a piece of preformed MDF that you can buy in the larger DIY stores. There are various patterns available, some are much more see-through than others so pick your design carefully.
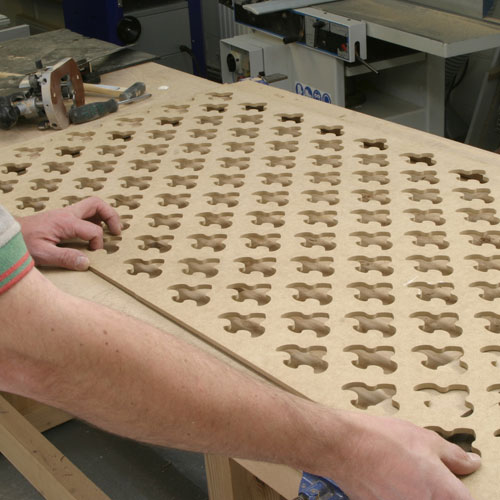
The grille needs to be carefully positioned so that the design is centralized within the frame, for the best of visual effect the cuts should cross the pattern in the same relative place at either end.
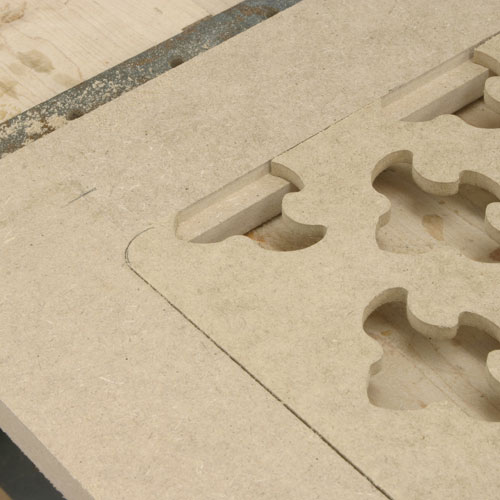
Then radius the corners of the grille so that it fits neatly into the rebate, but before you finally fix it run round the inside front edge of the frame with a suitable cutter to complete the panelled effect.
Step 9 - Finishing the Cover
Some final touches need to be done to reach the desired result.
The grille and its frame should now just drop into place in the groove between the plinth and the rear rail and is then held in place at the top with a couple of ball catches.
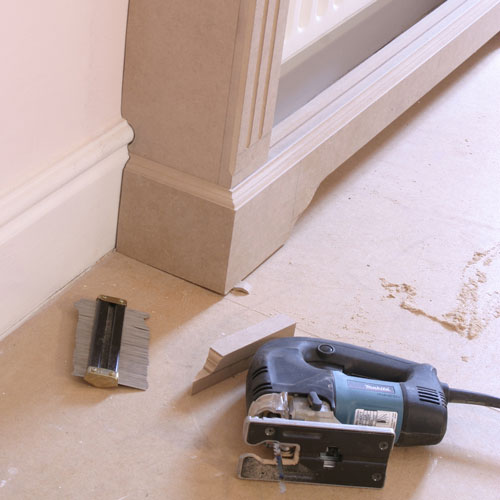
The completed cover is now ready for fitting, but rather than just stand it in front of the radiator I like to scribe it to the wall and skirting.
A template former is a great help here and some nifty work with the jig saw soon has it fitted neatly in place.
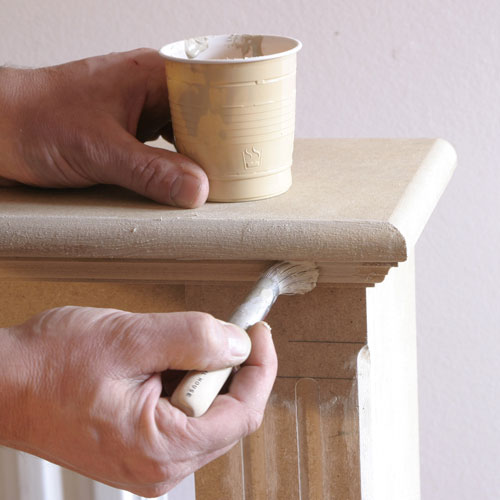
When it comes to finishing, there are several choices. The machined surfaces of MDF are always the most difficult to finish cleanly, as they always tend to fluff up as soon you apply any sort of paint, and being so porous then soak up the paint a lot more than the faces. For this reason I always start by sealing any cut surfaces with a very watery solution of fine powder filler. If you use a stiff stencil brush for this, the filler can be worked into the detail and shouldn´t require a lot of sanding when it is dry.
The completed Radiator Cover Routing Project.
Written by Alan Holtham - Established woodworking author and video producer.