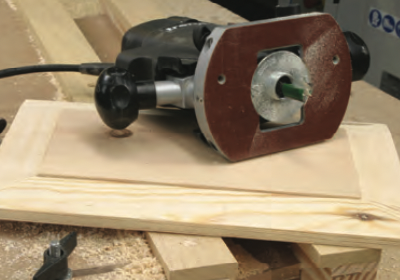
Jigs and Templates
The amazing versatility of the router can be increased even further with the addition of a variety of jigs and templates. Most of these arrangements are alternative means of guiding the router and enable you to carry out repeated operations with both accuracy and safety.
Jigs v Templates
The terms jig and template are often used synonymously although there are in fact subtle differences.
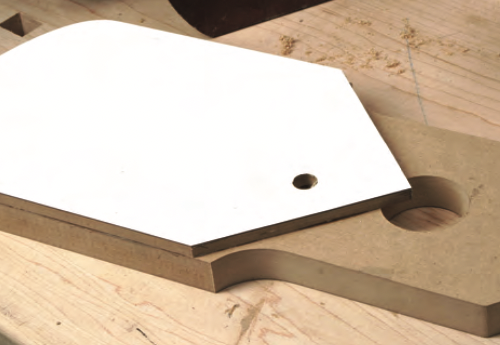
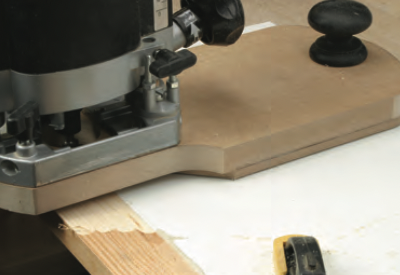
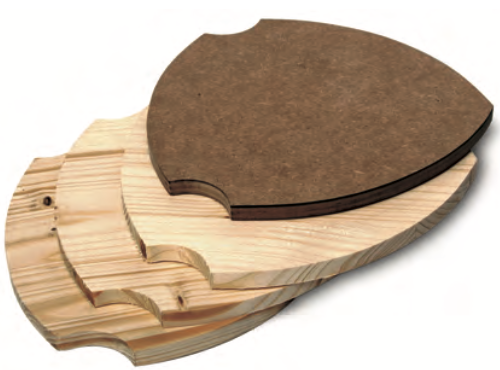
A template is normally a flat plate made from thin MDF, plywood or plastic which is attached to the work and acts as a master pattern for the router to follow, allowing numerous identical shapes to be cut or profiled. Templates must be cut very precisely and although there are a lot of ready made patterns you will often need to make your own to suit specific jobs.
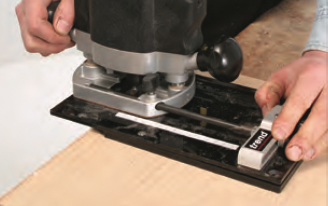
A jig on the other hand, is usually a more sophisticated arrangement that enables you to securely locate either the router or the workpiece, giving you suitable control to rout precise repeatable cuts.
The work needs to be clamped firmly within the jig to enable this repeatability and the jig itself must be strong enough to retain its accuracy and withstand constant use.
For mass production work, use a long bearing guided cutter and stack several workpieces together.
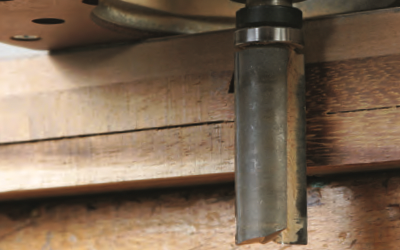
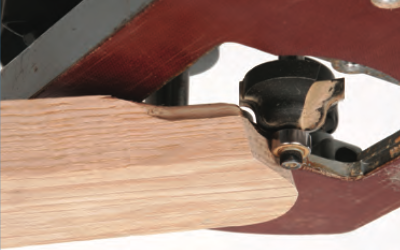
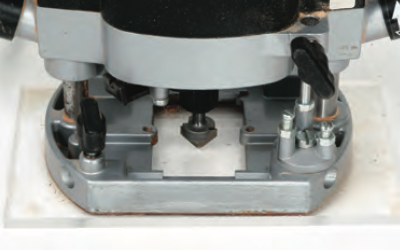
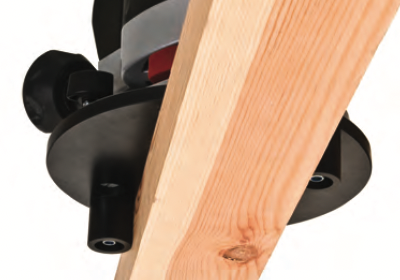
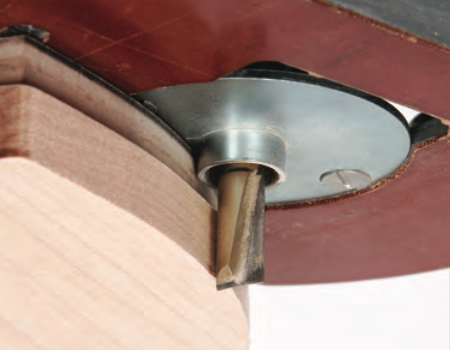
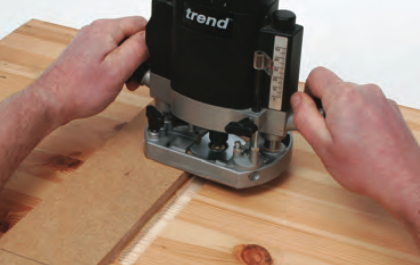
1) A metal guide bush fitted to the router base.
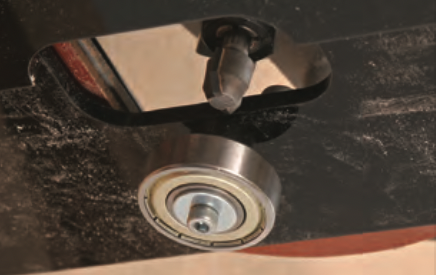
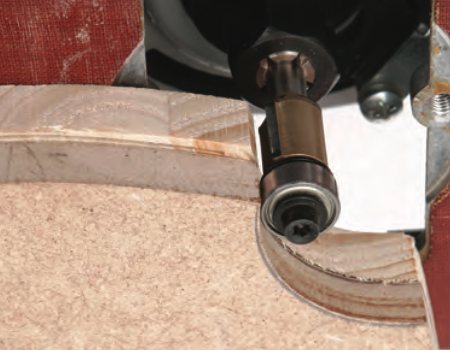
2) A roller bearing guide fitted to the end of the cutter.
3) A roller bearing guide fitted to the shank of the cutter.
4) The base of the router runs along the edge of the template.
5) A shaped sub base is fitted to the router base to run against the template.
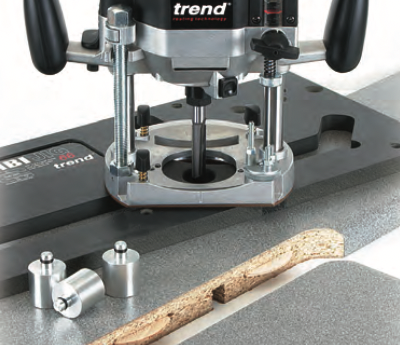
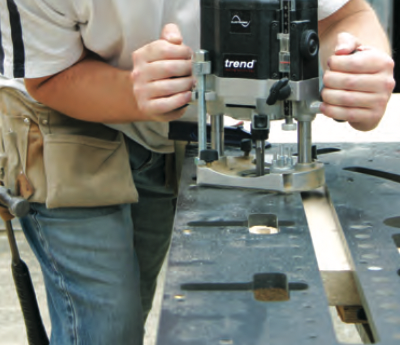
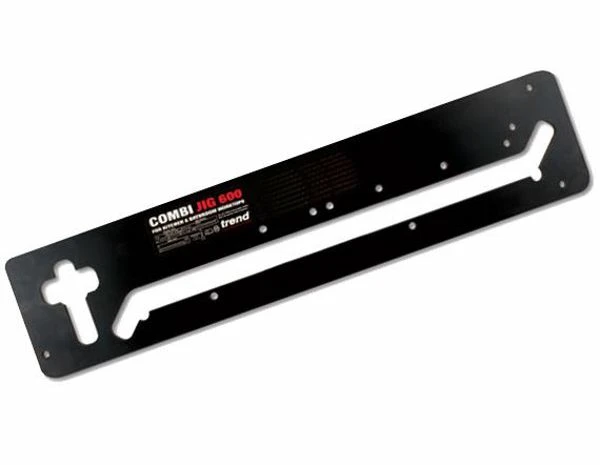
Commercial Jigs
There are also dozens of commercially made jigs. They simplify and speed up many of the repetitive jobs involved in domestic joinery. There are jigs for cutting joints such as dovetails, mortise and tenons, jigs for doors to fit locks, hinges and letterboxes. And for kitchens there is also a large range of worktop jigs. In fact the list is endless, with other jigs for cutting circles, ellipses, carving and lettering work.
As you would expect, some of these jigs are quite sophisticated and require careful setting up and adjustment. However, if used as intended, they are capable of producing work to extremely fine limits and will more than repay the cost of their initial investment.
When cut by hand, the classic dovetail joint invokes nothing but admiration and respect from any woodworker.
Unfortunately, unless you are very skilled and have plenty of time, it is a joint that is beyond the ability of most of us, particularly if there are many to cut. But with a suitable jig, not only does a dovetail joint become a reality, but the speed and quality of the finished job is outstanding and totally repeatable.

They all work on the principle of having a comb template working in conjunction with the guide bush fitted on the router. The timber is usually held in such a way that both parts of the joint are cut simultaneously.
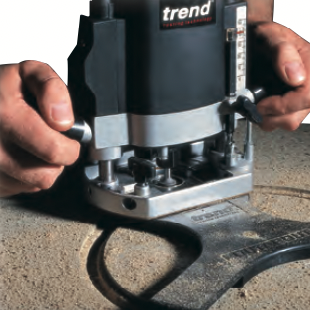
The initial setting up of the dovetail jig is quite critical and it is essential that your router is fitted with a fine height adjuster for the necessary precise adjustments. Nevertheless, a certain amount of trial and error is always involved to get a perfect fit, so you will need to allow a small amount of spare stock for this purpose.
There are several jigs available depending how much control you want to have over the final appearance. At the lower end of the scale, a basic dovetail jig will cut lap, or rebated dovetails but will not allow you to vary the pin spacing. You can however change the template for smaller joints or even to cut a comb joint or for dowelling.

More elaborate jigs allow you to vary the size and layout of the pins and tails and also cut proper through dovetails, rather than being restricted to the lap joint. These may initially seem rather complicated, but in fact many of the jigs are extremely simple to set up and you can change the start point of the joint, or the thickness of the material without the need for major adjustment.
At the top of the range there are very sophisticated dovetail jigs that allow you total control over the joint profile, to such an extent that you end up with a dovetail that looks hand cut, but which has in fact been cut in just a few seconds.

With the addition of special templates you can also use this jig to cut other wonderfully exotic joint patterns, the only limit being the degree of your creativity.
Mortise and tenon jigs
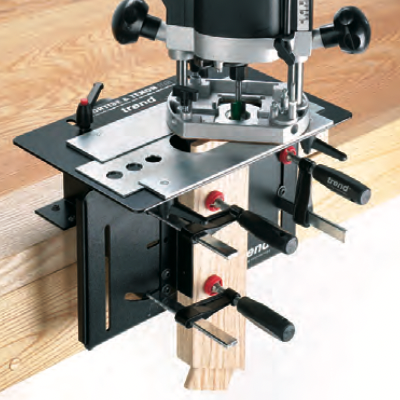
Mortise and tenon joints are used in many forms of joinery work such as frames for panel doors, carcasses for furniture and cabinets legs and rails for tables and chairs. Traditionally, they were cut either by hand, or by using different machines for each operation.

However, you can simplify the whole procedure using the router in conjunction with a mortise and tenon jig. On the better quality jigs, once it is set up to cut the tenon, the mortise is automatically set, which ensures a totally accurate fit each time. No repetitive marking out is needed; all you have to do is change the cutter and guide bush to switch between the two applications.

The jig is adjustable in both planes to allow angled or compound tenons to be cut, as well as the normal square ended versions. You can also use it to cut all the other forms of mortise and tenon such as haunched and mitre, as well as for drilling dowel holes.

Staircase jig
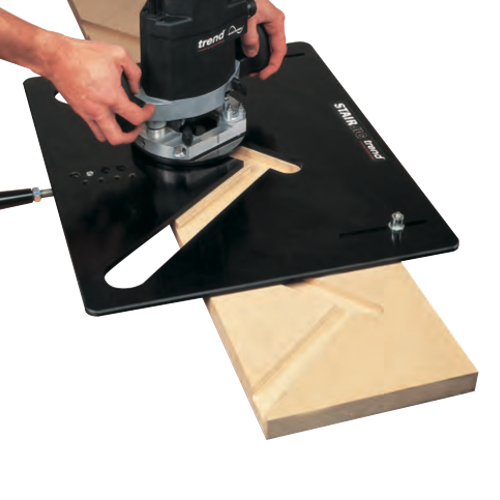
For those involved in building staircases, special housing jigs are available for accurately routing out the housings in the strings. As there is inevitably a lot of material to be removed, such jigs are normally used with a heavy- duty router and feature a reversible fence so each string can be matched perfectly.
Letterbox jig

The jig can be adjusted for size and is quickly set up, with the opening remaining perfectly square at all times.
Ellipse and circle cutting jig
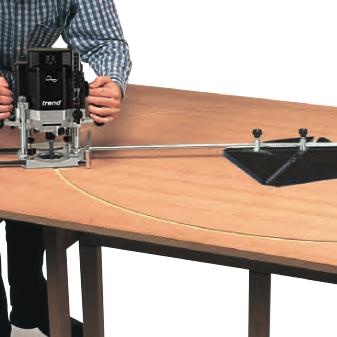
This is designed to enable virtually any router to cut an accurate ellipse or circle and is ideal if you are a cabinet maker forming tabletops, arches and the like. Using a router with this jig is perhaps the only way to get the perfect circular forms necessary for high quality work.
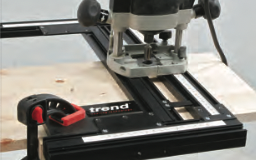
Worktop jig
The professional way to join two post formed worktops at right angles is to cut a butt and scribe joint. Although this can be done by hand, it requires some considerable skill to produce a close fitting joint that is virtually invisible and watertight.
A dedicated worktop jig will allow you to cut a perfect joint, as well as the necessary recesses for the connecting bolts. More refined versions also provide cutting guides for the ends of Peninsula tops.
Jigs are available for a variety of worktop widths and even allow for a faultless joint where the two tops need to be joined out of square to each other.
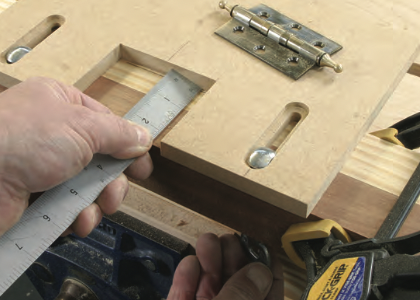
Hinge jig

The professional version of the hinge jig works on the similar principle to the one you can make yourself, but allows for multiple hinge positions or different sized apertures to be cut out in one setting.
Made from extruded aluminium, it can be used either on-site, or in a joinery shop and is fast and simple to operate. The hinge is actually used as the pattern so setting up
is both quick and simple and there is no need for the conventional time-consuming marking out. Obviously, the cornernof the recess is left radiused, but this is quickly squared up using a corner chisel.
Lock jig

This jig uses a set of interchangeable templates to cut both the mortise and the faceplate recess for a variety of different sized locks. Always a difficult job to do by hand, the deep mortise is cut very cleanly even on hardwood using a suitable long reach cutter. Once again, you will need to square out the corners of the faceplate recess.
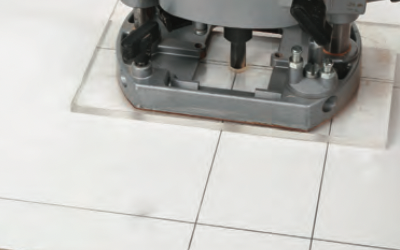
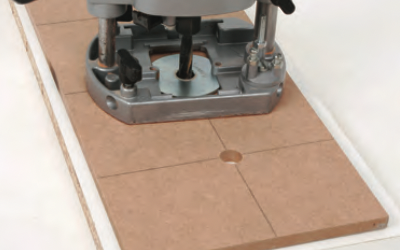
Routabout hole cutting jig
It is often necessary to have access points for pipes and cables beneath wooden floors. This jig allows you to cut the 250 mm diameter openings and then place the waste piece into a spacer ring as a removable lid. Suitable for 18 mm and 22 mm thick wooden floors, the jig yet again, demonstrates the versatility of the router for a wide range of applications.
Varijig frame system
This adjustable jig allows you to make up square or rectangular frames to any dimension, which can then be used to machine recesses, slots, panel moulds etc.
Belfast sink jig
An adjustable jig to accurately rout out the aperture in a solid wood kitchen worktop with the back corner radius and drip groove on the underside. For single or double Belfast or Butler sinks, it is used in conjunction with the draining board jig.
Draining groove jig
This jig is specially shaped to produce grooves which are very slightly sloped to assist the water to run away.
Making your own Jigs
The most effective jigs are undoubtedly the simplest, as these are quick to use and can be tailored to suit each individual situation. Sometimes they are made for just one particular operation and then discarded, but usually a well constructed jig can be used many times over, so it is worth investing some time and effort into making it properly.
For a jig to work properly, you must take account of several important design considerations, the most important of which is accuracy. The whole idea of a jig is that it allows you to perform exactly the same operation every time you use it. If it has not been made accurately enough to deliver this basic requirement you might as well not bother and save yourself some considerable frustration.
Many factors influence this accuracy; the jig must be stable and have some facility that allows it to be clamped firmly to the work.
The jig must also confine and guide the router precisely along the intended path, so it must be strong enough not to be deflected by the forces generated during the cut.
The router must also slide freely within the jig, so mating surfaces must be smooth and protected if there is any likelihood of wear, which could compromise the accuracy.
It must also be quick and easy to remove and replace the workpiece accurately, so some form of datum stop and quick release clamps are required on most jigs.
In some situations, it is necessary for the router to cut through into the jig itself, so allow for this by making a particular component replaceable, or by incorporating a sacrificial work pad.
Most importantly, the jig must be safe, holding everything securely and allowing you to work with your hands well away from the cutter.
Jig making materials

You can use a variety of different materials to make a jig, though MDF is particularly good as it is flat, perfectly stable and relatively cheap. Although it doesn’t take screws too well on the edges, it does glue together easily.
Solid timber may seem an attractive alternative for jig making as it is so much stronger, but large pieces are
liable to move, even when seasoned properly. So its use should be restricted to smaller structural components rather than important guiding surfaces. Even small amounts of natural movement are enough to destroy the accuracy of a jig, so combining hardwood with MDF achieves the best of both worlds.
Good quality plywood is another very solid jig making material though it is considerably more expensive than MDF and often not as flat.
Other plastic materials are also available, but due to their higher cost, they are best restricted to only the most critical parts of the jig, (normally the guiding template) but even then, only if it is going to be used frequently. Tufnol is a superb material that is smooth and strong and can be machined with most TCT cutters. The cheaper alternative is clear acrylic sheet, which again is easily machined, but is more brittle.
A good compromise is to use MDF for the majority of the jig and then cover any surfaces that are subject to wear with a layer of laminate.
This is easily applied using an impact adhesive, leaving it slightly oversize and then trimming back with a suitable bearing guided cutter.
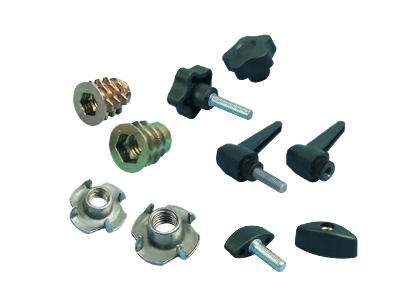
More sophisticated jigs will need removable or adjustable components. You can buy a huge range of jig making accessories from specialists router suppliers, like Trend.
Levers, threaded inserts, scales and template making material, as well as double sided tape and toggle clamps for holding the workpiece in the jig are all available.
Having made your jig, it is obviously important to hold the work securely within it and you may have to adopt various holding strategies.
These depend on the type of work, but as well as the toggle clamps mentioned above, other alternatives include the use of spikes, eccentric cams, double-sided tape, wedges, abrasive paper, special mats and vacuum beds.
Sometimes the work has been predrilled as part of its manufacture and this hole may be used as a means of locating and securing it. In fact, any clamping method can be used, as long as it doesn’t interfere with the path of the router or restrict the removal of the work from the jig.
You will soon build up quite a collection of different jigs so it is worth labelling each one with what it does and also make a note on it if there are any particular cutters or guide bushes that are needed for its use.
Attaching the router to a Jig
Some of the most useful jigs and work aids need to be fitted directly to the router base. When you are purchasing a router make sure it has suitable tapped holes in its base. Look for routers with the TBC logo which is a standard configuration for many bolt on sub bases and router table fixings.
For future reference, when you start making jigs and templates, it is a good idea to make up a pattern of your router base.
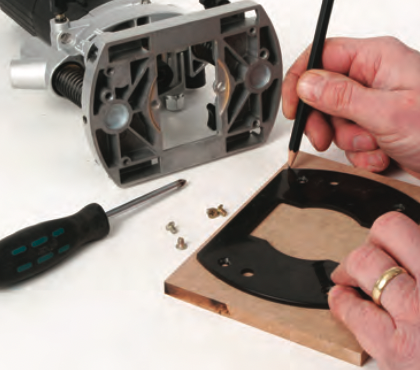
If your router has a detachable soleplate, the job of making this template is very much easier. Simply remove the soleplate and fix it with double-sided tape to a piece of thin MDF which has been roughly cut to shape.
Then use a flush trimming cutter in the router, minus its soleplate, to produce a perfect pattern.
The fixing holes are easily located using the soleplate as a drilling guide.
If the base is not detachable, a pattern can be made by drawing around the router base and then cutting or sanding the MDF to shape.
Alternatively, the fixing holes can be accurately located by making a couple of sharpened studs from appropriately threaded bolts, cutting off the heads and sharpening one end.
Then screw these into place in the base so that the points are just sticking out proud, then press the router down onto the template and the hole centres will be marked perfectly.
The alternative is to use the Trend Unibase that is drilled to accept most routers.
If the router doesn’t have any fixing holes other than those for the guide bush, you can always the use the guide bush itself as a template to get the holes accurately located.
Simple work aids and jigs
The range of homemade jigs is virtually limitless and you will no doubt design and develop some of your own to suit specific applications. However, there are a few simple jigs that are so universally useful and quick to make that every router user should consider making them. Here are just a few:
Base extension
Often on edge moulding jobs there is very little support left for the router, particularly if it is a narrow workpiece or you are working round a corner.
In this situation, it is so easy to accidentally tilt the router and leave an unsightly scoop in the mould. Those routers with very large base openings are particularly vulnerable.
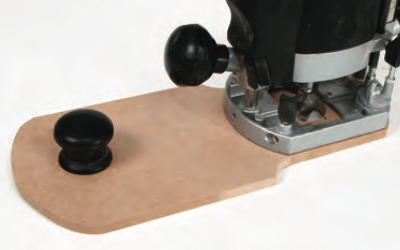
Beware of making this extension plate too thick or you will reduce the depth of the plunge capacity of the router. 6mm or 9mm material is plenty thick enough.
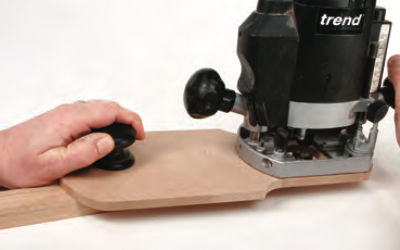
For larger and heavier routers, this setup may still not provide sufficient support and a larger base extension with two guide handles may be necessary.
Centre finder
This is often called a ‘drilling base’ as it allows precise location for plunging cutting holes in the workpiece. Although somewhat limited, the router makes an excellent drilling device, particularly on large workpieces where the holes are too far in to be reached with a drill press. The router is able to cut a perfectly clean 90 degree hole to a precise depth.
This particular jig needs to be made from Perspex and is best made by first fixing it to the base of the router.
Then plunging down with a V cutter to mark the centre point.

Now remove the Perspex and scribe the crosshair lines at 90° to each other, with the intersection centred on this marked point.
Replace the Perspex on the router and drill through it with a cutter slightly bigger than the one you’ll be using for the drilling operation.
To use the jig, the location of each hole is marked on the workpiece with intersecting lines and the jig just needs to be lined up with these before plunging in with a suitably sized cutter.
You can even bore holes at an angle by adding shims to one end of the base though this makes precise centring more difficult.
A variation on this is to locate the router onto the drilling template using a guide bush which is a close fit in the template.
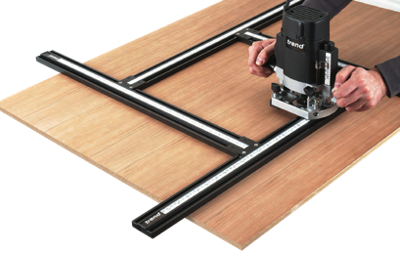
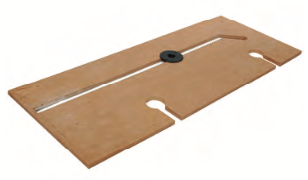
Trimming jig
This simple jig is designed for quickly trimming the end of boards to exact length and leaving a perfect finish across the end grain, something not normally possible unless you have a panel cutting table saw.
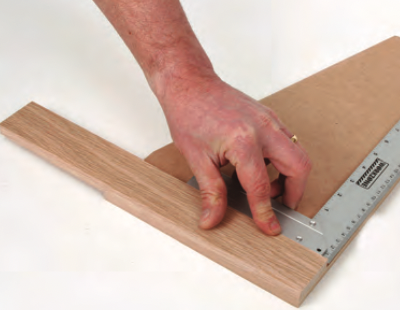
All you need is a perfectly straight timber batten about 250 mm long and no thicker than the material being trimmed. Stick this to a piece of MDF with another perfect straight edge, making sure that the two form a right angle. Make this MDF slightly longer than the widest piece you anticipate trimming and also make sure that the batten end is flush with the edge of the MDF.
Cut the workpiece to within about 2 mm with a saw, then clamp it to the jig or use some double-sided tape to hold it in place, lining up the end of the batten with the cut line. Now use a bearing guided trimming cutter to run across the end of the board using the edge of the MDF as the guide.
This will result in a perfectly clean and square cut in both planes and is a wonderful aid if you have a batch of boards to prepare for a project such as a bookcase.
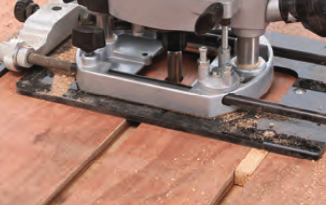
Housing jig
The simple housing joint is one of the most useful for building shelf units and cabinets. Cutting the necessary groove with a router makes it almost foolproof, providing you can guide the cutter accurately.
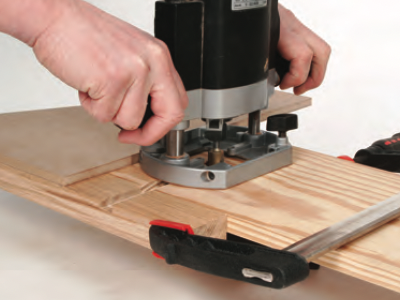
This jig is very similar in construction to the trimming jig but is made with a heavier section batten which extends well beyond the end of the MDF fence. Use it with a bottom cut two flute cutter, but this time use the base of the router running against the fence as the guide.
You must maintain positive pressure against the fence at all times to prevent the cutter wandering off course. If you don’t have a cutter of exactly the right size, take two passes with a narrower cutter, moving the jig to the required amount.
After the first groove is cut, it is a simple matter to line up the jig for each subsequent housing by positioning the edges of the cut groove in the batten against the marked lines on the work.
If the housings are to be stopped, you can either stick or screw stop blocks onto the MDF to limit the amount of travel of the router.
Self centring mortising and slotting jig
This is another very simple jig which allows you to cut slots or mortises that are perfectly centred along the workpiece edge, no matter how thick it is.
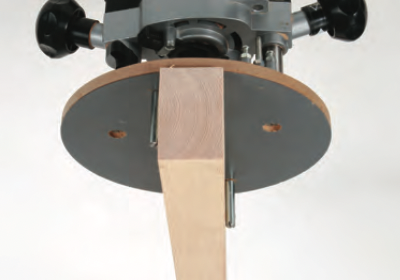
Again, you will need a sub-base but this time fix two dowels or metal studs into it, about 75mm apart, but centred on a line through the centre of the base.
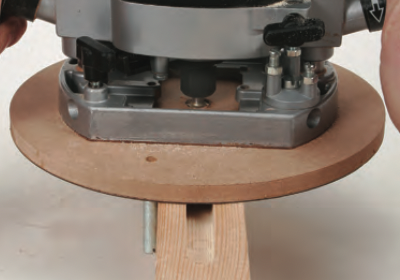
To use the jig, mark the limits of the required groove on the workpiece, position the router over the work, holding it so that the pins are on opposite sides of the edge. Maintain gentle twisting pressure at all times to keep them both in contact, then plunge and cut the slot to the required depth.
The slot will be perfectly centred. If the work is particularly narrow, it may be necessary to reposition the pins closer together or you will not be able to use the jig close to the end of the work.
Corner rounding jig
It is often necessary to cut matching rounded corners on the end of table tops and you can very quickly make up the jig that reproduces exactly the same curve each time.
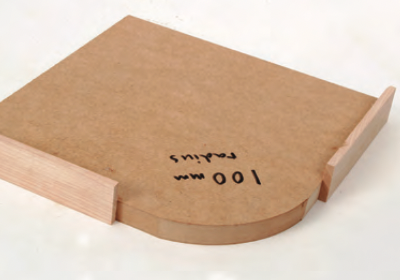
The jig itself is an exact size template of the corner with two thin hardwood stops fixed along adjacent edges.
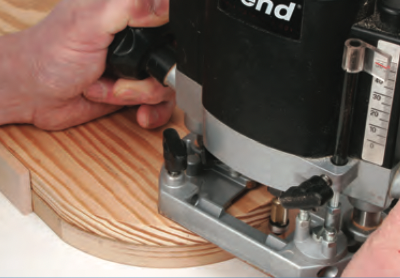
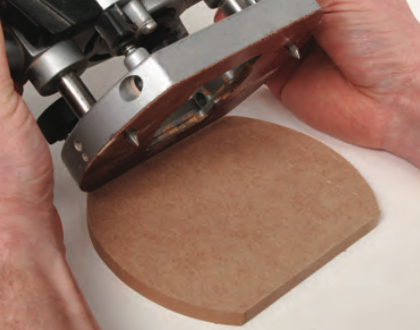
All you have to do is roughly cut each corner to shape with a jigsaw, then clamp the jig underneath the work and run round the corner with a bearing guided flush trimmer to produce a perfect radius each time.
More elaborate jigs
Although simple jigs are usually the most effective, it sometimes becomes necessary to make them more elaborate, often building in integral clamping for quick change over and repositioning.
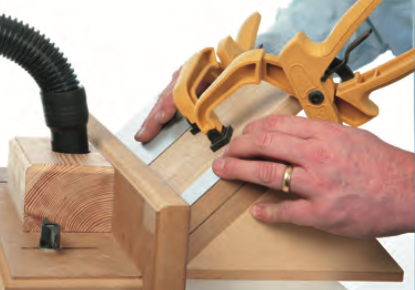
Hinge jig
Forming the recess for a hinge can sometimes be quite tricky, particularly if the grain of the timber slopes diagonally.
It is important to get the housing perfectly flat and the router is the ideal tool for this job.
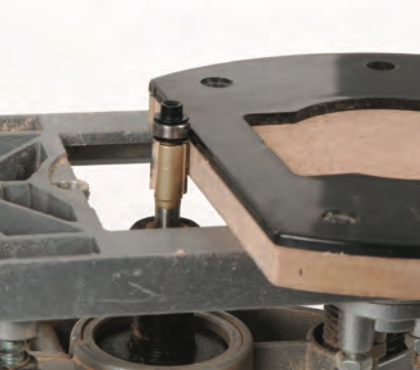
The jig in this case consists of a template fitted to a hardwood batten, the template being slotted to allow it to slide from side to side. For this jig, the guide bush is used in the base of the router and the template must be cut to suit the specific hinge size, but allowing for the guide bush margin.

To calculate the margin, deduct the cutter diameter from the guide bush diameter and divide by two.
Cut the template from Perspex or MDF allowing extra width and length to provide enough support to prevent the router from tipping. Scribe a centre line across the back of the template.
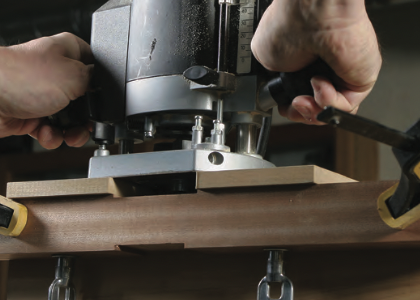
This template is fixed to the batten using bolts and knobs, and once positioned, the whole assembly is firmly clamped to the door with the jig centre line aligned with the centre of the recess. The template can then be slid backwards and forwards to adjust the width of the recess.
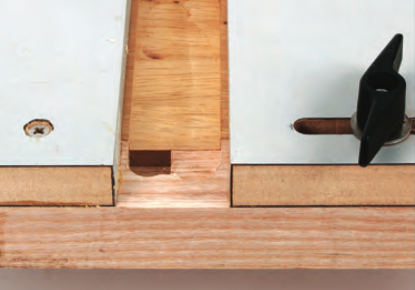
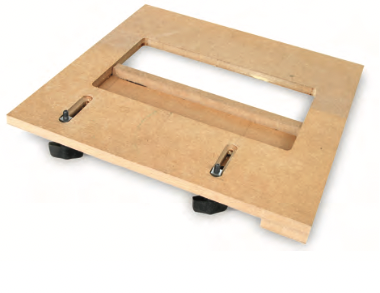
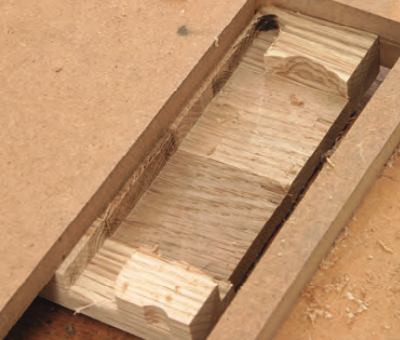
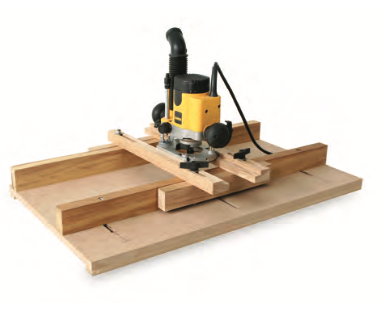
Adjustable housing jig
This is a more sophisticated version of the simple housing jig, as it is fully adjustable and provides complete control over the path of the router. There is no chance of it wandering as can happen with the simpler straightedge arrangement.

A few hours spent constructing this jig will quickly be rewarded by years of frustration free slot cutting, and housing joints will now become a pleasure rather than a trial.
The jig is used in conjunction with a guide bush on the base of the router. You can either set the two cross boards so that the bush just slides easily between them using a cutter to the width of the groove you want, or if you want a wider groove open the cross boards out and run the bush down either side of them.

An end stop is easily fitted if you want to form stopped housings.
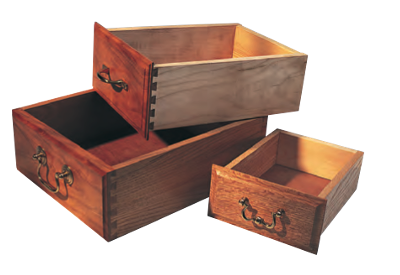
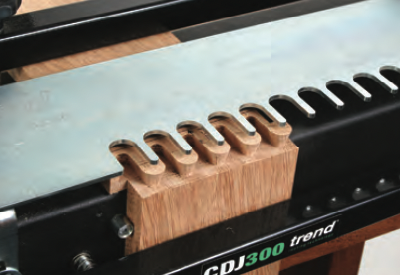
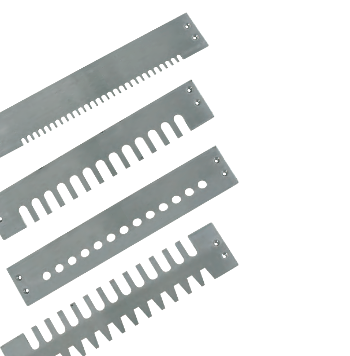
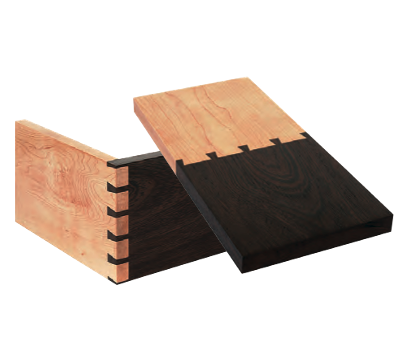
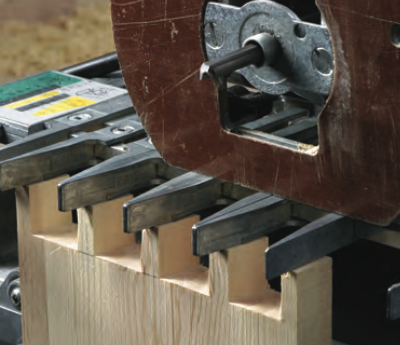
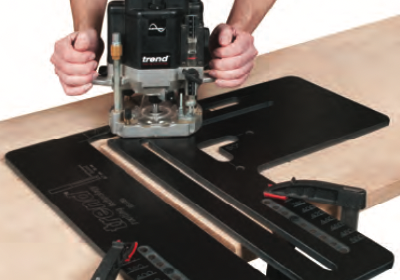
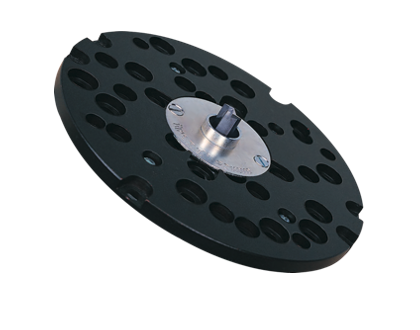
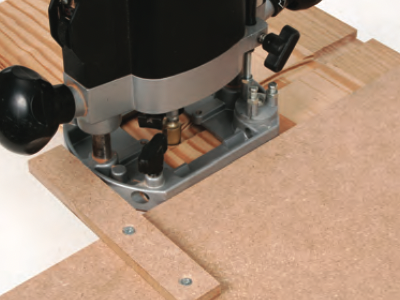
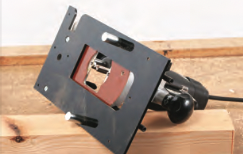
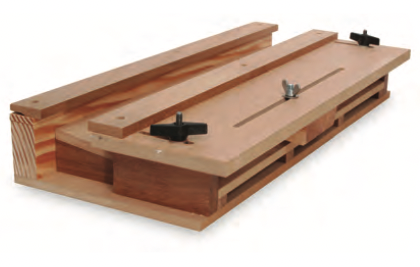
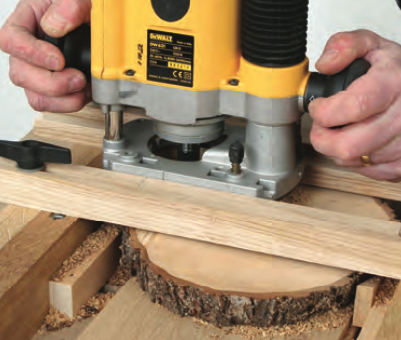
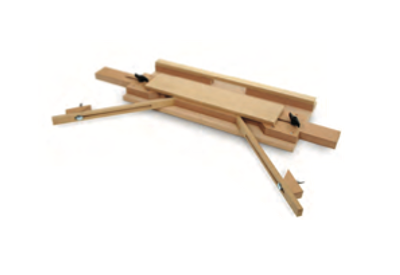
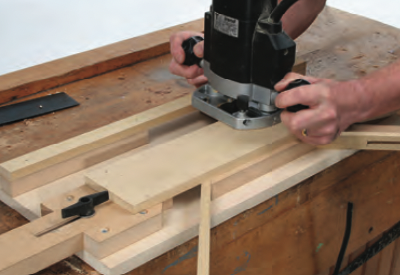
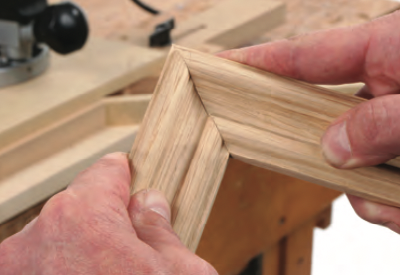
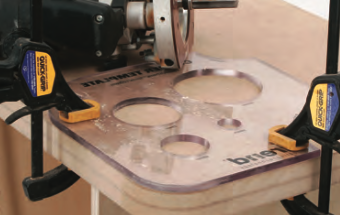
Comb jointing jig
The finger or comb joint is a very strong way of joining two pieces at right angles for a box or a drawer, and the result can be quite decorative as well. There are several ways of forming the joint, but now that the use of wobble and grooving blades is illegal on a circular saw, the router is one of the best tools for the job. Once you have made this jig it can be used time and time again on a variety of different projects.
For this one, the router has to be fixed underneath the table of the jig and again you can use the base template to position the mounting holes, making sure that the cutter ends up central in the hole of the top. Use a fine height adjuster as well if you have one, as it makes precise setting of the joint size so much easier.
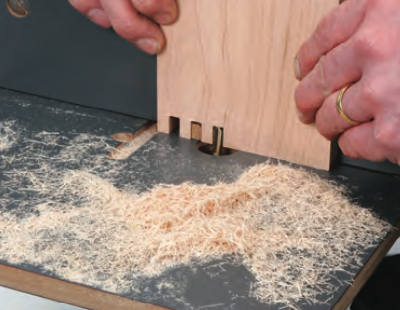
The extra overhang of the table allows you to clamp it in position on your workbench, this way you can quickly dismount it and easily put it away when it is not wanted.
Panel raising jig
The traditional fielded panel has made a significant comeback in the design of modern reproduction furniture and because of this a full range of dedicated profile forming cutters is now available.

Whilst these cutters are very effective, the majority of them are very large in diameter, which in turn necessitates the use of a router table and a heavy-duty router.
However, for the smaller workshop, where fielded panel production is a relatively rare event, a less expensive alternative is available.
With this jig, you can still produce fielded panels using just a medium duty router, provided you have a large diameter straight cutter with bottom cut and a suitable guide bush with good clearance to fit over it. Even in very hard timber, the fielding is soon perfectly formed with very clean edges round the edge of the central raised portion.
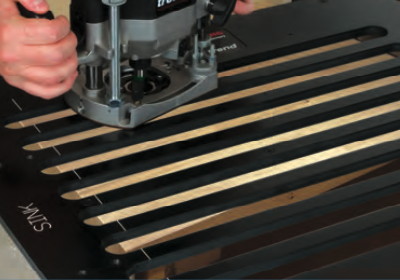
Multiple grooving jig
Multiple grooving is a common operation in woodworking and the router is the perfect tool for the job. The grooves may be widely spaced, as in shelf housings, or they may be close, like drawer runner grooves. No matter what the purpose, it is essential that the grooves are evenly spaced on matching components or the job will not line up.
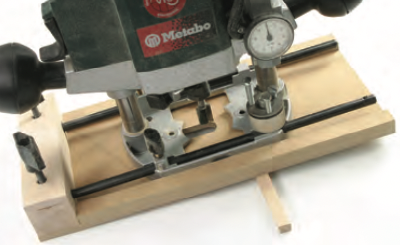
The answer is usually to make a simple jig consisting of a plate of MDF fixed to the base of the router with a suitably sized guide strip or slide screwed to it to locate in the previous slot. These are usually custom made jigs and discarded at the end of a job.
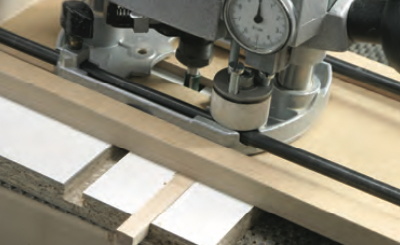
More sophisticated adjustable versions like this allow you to cater for a variety of groove widths and spacings.
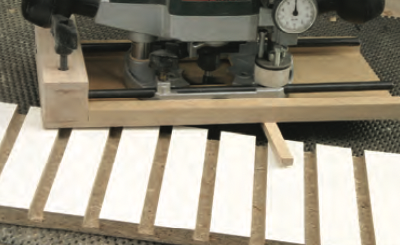
You form the first groove with either the router side-fence or using a straightedge as a guide. Then position the slide in this groove and adjust the router position for subsequent grooves.
Tenon
There are various ways of cutting a tenon joint, but with its consistent depth cutting, the router lends itself to the job particularly well.
This simple jig allows you to cut several components at once, considerably speeding up the process and is ideal for semi batch production. Precise control of the cutter depth makes for an accurate joint with perfect reproducibility.
In effect, it is just a guide fence that clamps square across the ends of the work, but with a sliding support to prevent the router tipping as you cut away the joint. The same jig can also be used for cutting halving joints, the only necessary variation being the depth of cut you set on the router.
Thicknessing jig
There is no doubt that the most effective way of surfacing any piece of timber is by using the conventional combination of a planer and thicknesser, but sometimes you come across a job where this approach just doesn’t work or the equipment is not available.
For instance, some workpieces may have very interlocked grain, which is impossible to plane in any direction. Also, the board may be so badly warped that it is difficult to control its orientation for the initial surfacing cut. You may even need to plane the end grain, which is not easy on a planer.
With its cutting action at 90° to that of a standard planer, the router is better suited to tackle this tricky thicknessing work and this jig allows you to machine flat surfaces with ease. However, with a few simple modifications, it has further potential for tapered or hollow work as well.
Mitre trimmer
There are dozens of ways to cut a mitre, some of them more accurate than others, but the router is perhaps an unusual choice of tool for the job. However, it is easily capable of producing the quality cut essential for close fitting mitres, a quality that is not consistently achievable using other methods.
To use this jig, you need a router with a guide bush and a suitable two flute cutter. The sizes are not critical; a 12 mm cutter with a 20 mm guide bush is a good combination. The only essential requirements is that the cutter is really sharp. Larger diameter ones will be more rigid and less prone to vibration.
The router is then rested on the two running strips and passed across the end of the pre- cut moulding to provide the final trim.
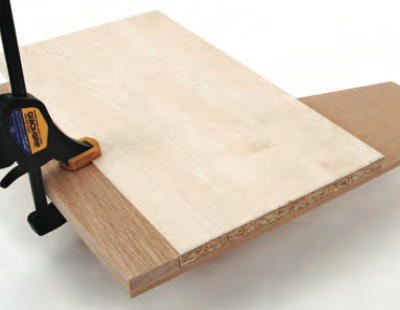
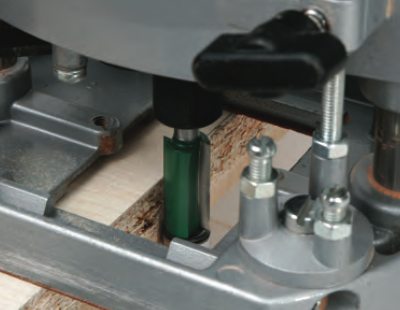
Flush trim
If you use any form of man-made board, the chances are that at some time you will need to lip it, and this can be a tricky operation. Aligning the top edge of the lip perfectly flat with the surface of the board is not easy, particularly if the lipping is slightly warped.
This trimming jig overcomes all these problems and allows you to fit a slightly oversized lip and then trim it off flush with the surfaces of the board. It works with either a narrow lipping or a wider edging, but you will need to use a sharp bit in the router to minimise cleaning up afterwards.
Provided you have the cutter set accurately, you can trim the lipping back perfectly without damaging the board surface, though a fine height adjuster on the router is essential to set the precise depth.
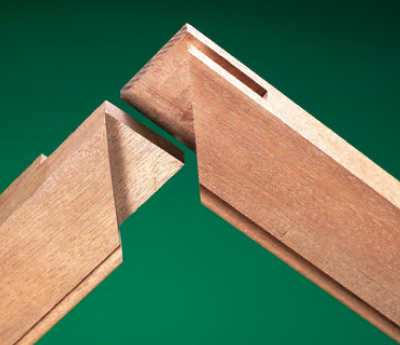
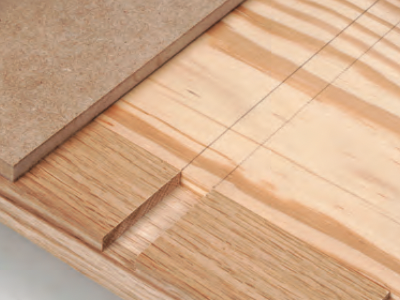
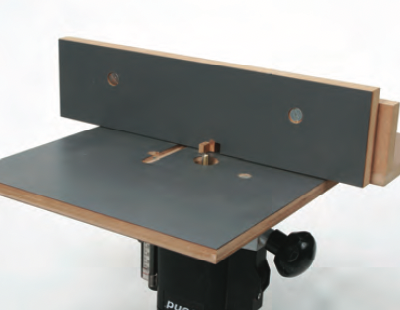
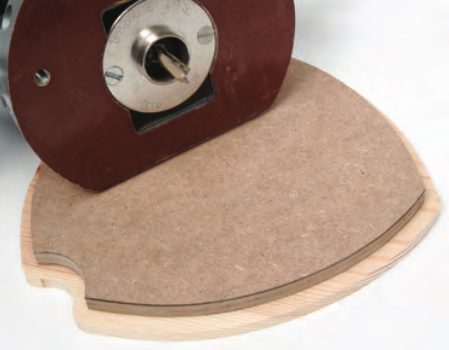
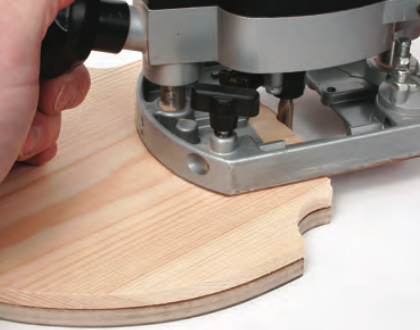
Templates
Like routing jigs, templates simplify many routing operations involving both regular and irregular shaped work and also offer an accurate method of performing repetitive operations such as recessing, edge or panel moulding, edge trimming, slotting and dowelling. As we have already seen, templates may form part of a jig, the purpose of the jig being to quickly and accurately position the template on the workpiece, or to hold the template for cutting several workpieces for simultaneous machining.
The advantage of using templates is that most of the difficult work is done in producing the actual template itself. It provides accurate repetition and avoids the risk of mistakes when cutting the work freehand. So not only does a template save time when cutting matching components, but it also eliminates any chance of error.
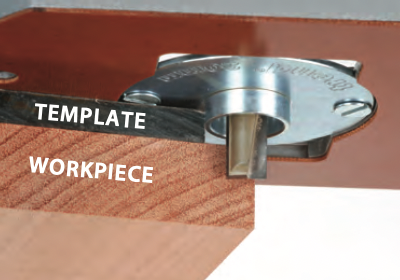
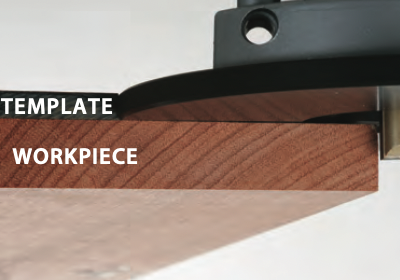
For the professional user, this is vital as it speeds up the work flow and minimises material wastage. Each piece cut from a specific template will be identical to the next. Templates can be used with guide bushes or bearing guided cutters.
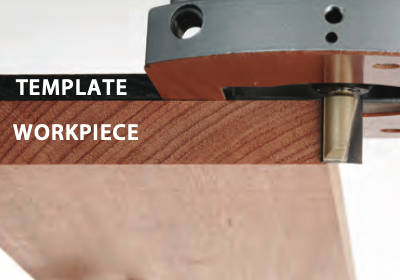
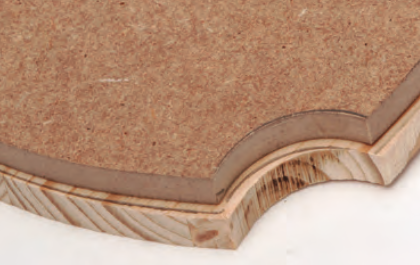
If you are using a bearing guided cutter, the template is easier to make as it is exactly the same size as the workpiece, but it doesn’t allow you to control the depth of cut, essential for work such as inlaying.
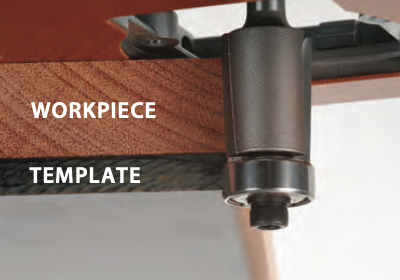
With a guide bush, the situation is a little more complicated and the template obviously has to be cut over or under size to allow for the guide bush margin, but you do have control over the depth of cut.
Also, by fitting different sized guide bushes in the router you can use just one template to cut different sizes.
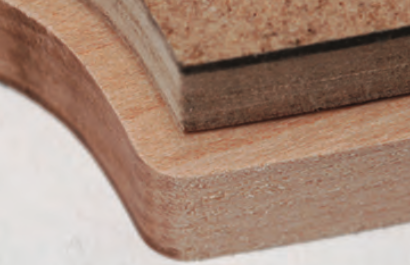
Another difference between the two guiding methods shows up at external sharp corners, which become slightly radiused if you are using a guide bush.
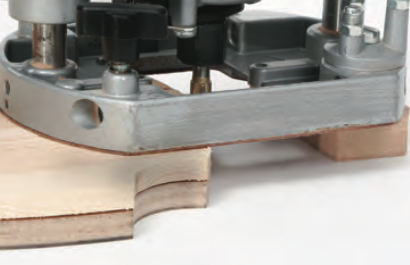
Templates should be designed to afford as much support for the router as possible. In situations where the router overhangs the edge of a template, or the template extends beyond the edge of the workpiece, levelling blocks should be fitted to prevent the router tilting and producing a cut that doesn’t register properly with the template.
The template obviously has to be strong enough that it does not distort during use, but if you’re using a guide bush it is also important that the thickness of the template material exceeds the depth of the guide bush ring and allows a clearance of, at least 1 mm, between the tip of the ring and the surface of the workpiece.
It is essential that the template is followed in the correct direction to keep the ring tight against the guide edge. If you don’t, the cutter will deflect away. Remember to work anti-clockwise on external templates and clockwise for internal templates to maintain this correct orientation.
There is a necessary compromise to be made as regards to fixing the template on the work. It needs to be perfectly secure to accurately reproduce the pattern, but you should be able to remove it easily for repositioning on the next piece. In some situations, simple locating blocks and the downward pressure of the router will hold the template in place, but it is always advisable to secure it further with cramps or some other holding device.
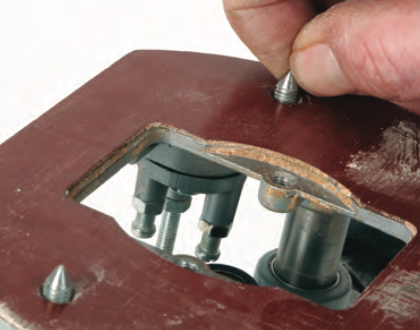
On painted or concealed work, the template can be simply pinned or screwed in place.
Templates can be cut from any piece of smooth surfaced sheet material that is easy to work and finish. Although it must be thick enough to keep the guide bush clear of the work, it must not be so thick that it reduces the depth of cut. MDF is suitable for general use, but for templates likely to be used more often, materials such as ‘Tufnol’ or non shattering plastic are recommended. All the edges must be finished really smooth as any unevenness will be reflected on the finished cut. Ideally try and use the router itself for this shaping as it will leave the template edges smooth and square without requiring any further cleaning up.
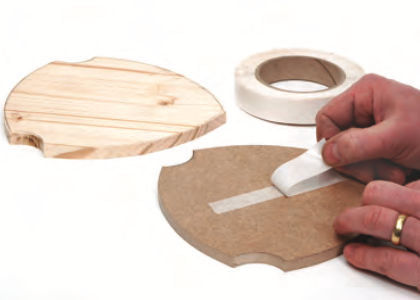
On flat work it can be held in place with double-sided tape provided the surfaces are dust and grease-free. If you anticipate using a particular template frequently, seal the surface with sanding sealer and you’ll then get much better adhesion with double- sided tape.
Although you could theoretically use the router with a template to actually cut out a shape, realistically, this is rarely practical, you would have to use large diameter cutters to prevent them snapping and the amount of time and waste involved is prohibitive.

To reduce the time and wear on the cutter, cut the workpiece roughly to size with a bandsaw or jigsaw and then use the router in conjunction with the template to trim back the exact dimension.
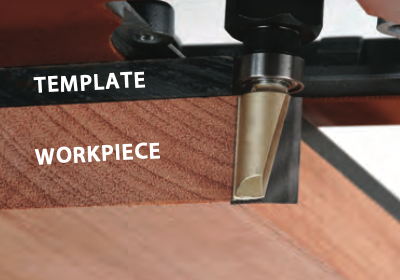
The most basic template is a simple straightedge which is either clamped or stuck to the workpiece. This allows you to make a trimming cut if you use a bearing mounted cutter, or to cut grooves if you use the guide bush and a two flute cutter.
For better control, particularly for grooving, or for critical cuts like worktops, the double straightedge is better, with the guide bush running within a suitable slot cut in the template.
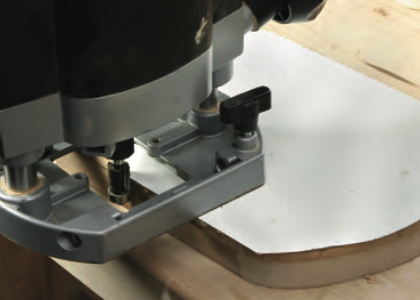
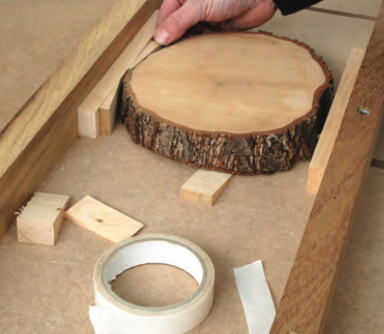
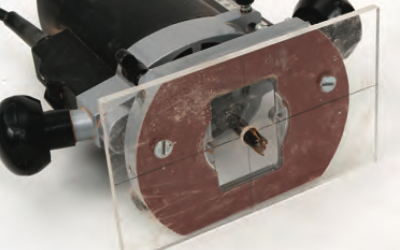
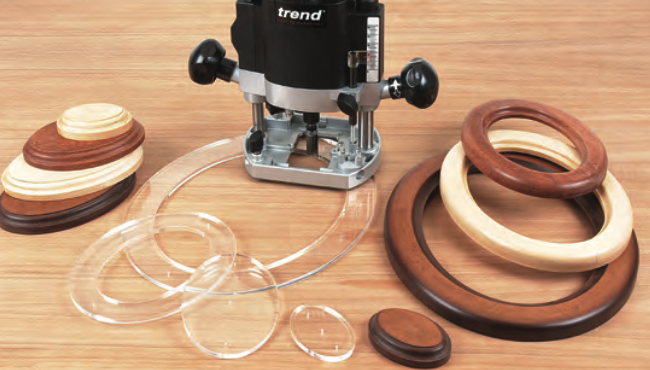
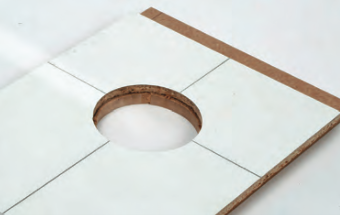
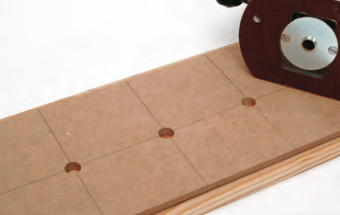
Circular templates are also very useful to cut and trim curves to a required smooth shape. The finished result is entirely down to the quality of your templates, but you can then use the router to cut circles, round corners and ovals as well as holes and recesses.

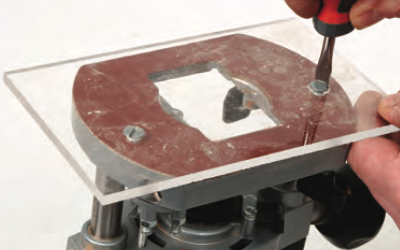
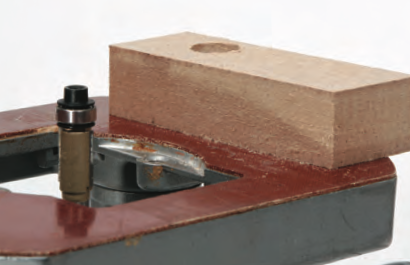
To form a circle template first cut a smooth sided hole with a suitable hole saw. For accuracy, do this on a drill press and clamp the template material securely to make sure it doesn’t move.
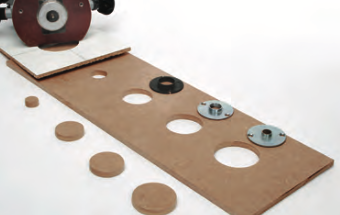
From this one template, a series of decreasing diameter templates can be cut using different guide bush and cutter combinations.
To cut templates of a larger diameter use a self guiding rebate cutter. In the centre of the new template, cut the hole roughly to size with a jigsaw and then tape or pin the new template over it.
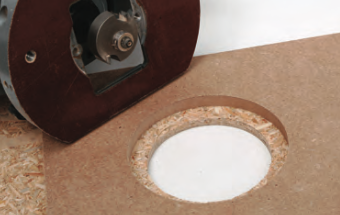
With the rebate cutter fitted in the router, set the depth of cut fractionally deeper than the template material (the cutter will cut slightly into the surface of the first template). Position the router with the bearing through the hole in the top template and cut away the waste by running the bearing around the inside edge of the bottom template.
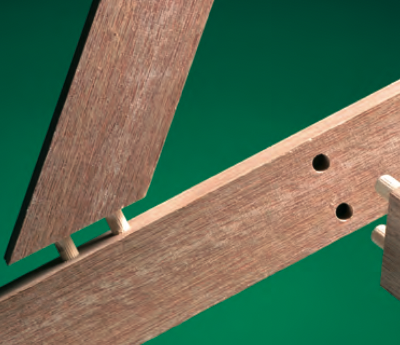
Guide bushes can also be used with templates for locating the router when fitting dowels or support pegs for shelves etc. Mark out the centre-point of each dowel position on the template or a square edged piece of clear plastic. Drill a hole equal in diameter to the guide bush. Locate the template over the workpiece by either fitting locating blocks or by scribing lines across the guide bush hole and then holding the router securely, plunge in to drill the hole.
Proprietary templates
There is an equally large range of ready- made templates available for more common applications. The advantage of manufactured templates is that they are usually of better quality than those you can make yourself and the finish produced from the cutter is therefore better.
Others allow you to use the router for more artistic purposes such as inlay or panelling work.
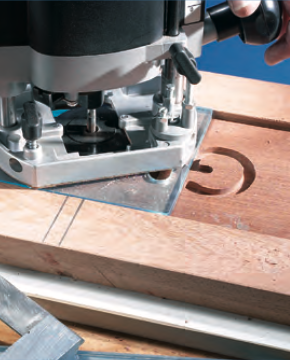
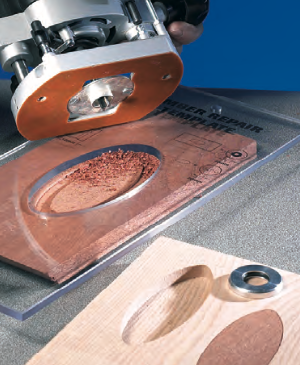
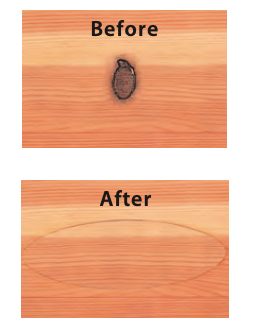
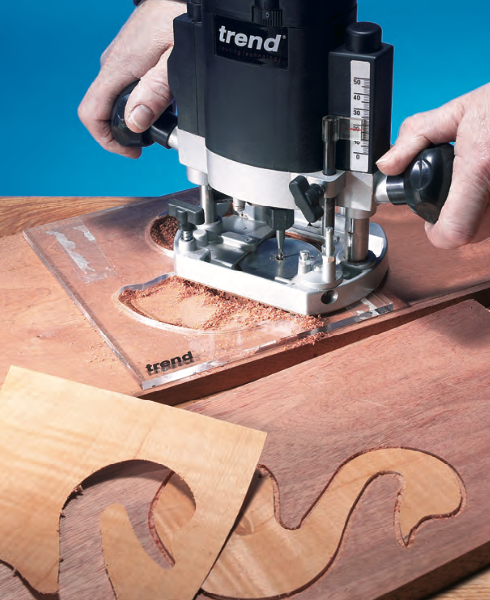
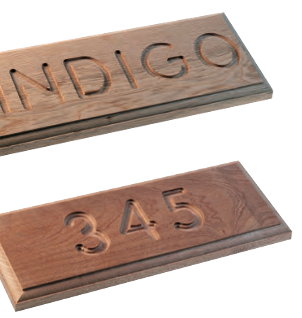
For sign work there are dedicated templates for cutting numbers and letters that only require the use of a small guide bush and a suitable cutter.

Other useful bought templates are available for fitting cable tidies in desktops and for repairing damaged areas of timber.